
環境・条件
- React Native の初心者向け
- Expo 開発環境:v36.0.2
- ScrollView を関数コンポーネントで実装します。
手順
App.js を以下のように作成し、設定を追加していきます。
// App.js

import React, { memo } from "react";
import { View, Text, StyleSheet } from "react-native";

const App = () => {
  return (
    <View style={styles.container}>
      <Text>App</Text>
    </View>
  );
};

const styles = StyleSheet.create({
  container: {
    flex: 1,
    alignItems: "center",
    justifyContent: "center"
  }
});
export default memo(App);
スクリーンの高さとコンテンツの高さで判断するのがポイントです。
- Step 1コンテンツの最下段までスクロールできるように。
以下は、
ScrollViewをSafeAreaViewでラップして使う前提です。SafeAreaView の style に
{flexGrow:1}を追加します。
※{flex:1}に設定するとコンテンツの最下段が見えなくなります。// App.js import React, { memo } from "react"; import { Text, StyleSheet, SafeAreaView, ScrollView } from "react-native"; const App = () => { return ( <SafeAreaView style={styles.container}> <ScrollView contentContainerStyle={styles.scrollView}> <Text>App</Text> </ScrollView> </SafeAreaView> ); }; const styles = StyleSheet.create({ container: { flexGrow: 1 }, scrollView: { backgroundColor: "pink", alignItems: "center", justifyContent: "center" } }); export default memo(App); - Step 2コンテンツの高さを取得します。
onContentSizeChangeprops を利用します。ハンドラー関数 (
handleContentSizeChange) を作成し、デフォルトでパラメーターとして渡されるcontentWidth、contentHeightの中で高さ (contentHeight) だけを利用します。ScrollViewにonContentSizeChange={handleContentSizeChange}を追加します。<ScrollView onContentSizeChange={handleContentSizeChange} // 追加 ... >取得したコンテンツの高さを State (
ctxHeight) に保存します。import React, { memo } from "react"; import { SafeAreaView } from "react-native"; ... const [ctxHeight, setCtxHeight] = React.useState(0); const handleContentSizeChange = (contentWidth, contentHeight) => { setCtxHeight(contentHeight); };↓↓
// App.js import React, { memo } from "react"; import { Text, StyleSheet, SafeAreaView, ScrollView } from "react-native"; const App = () => { const [ctxHeight, setCtxHeight] = React.useState(0); const handleContentSizeChange = (contentWidth, contentHeight) => { setCtxHeight(contentHeight); }; return ( <SafeAreaView style={styles.container}> <ScrollView contentContainerStyle={styles.scrollView} onContentSizeChange={handleContentSizeChange} > <Text style={styles.text}>App</Text> </ScrollView> </SafeAreaView> ); }; const styles = StyleSheet.create({ container: { flexGrow: 1 }, scrollView: { backgroundColor: "pink", alignItems: "center", justifyContent: "center" }, text: { fontSize: 42 } }); export default memo(App); - Step 3スクリーンの高さを取得します。
Dimensionsか、useWindowDimensionsフックを利用して取得できます。// Dimensions import { Dimensions } from "react-native"; const {width, height} = Dimensions.get('window')// useWindowDimensions import { useWindowDimensions } from "react-native"; const ScrollViewExampleScreen = () => { const window = useWindowDimensions(); ...ここでは
useWindowDimensionsのwindow.heightを使用します。 - Step 4Scroll 機能を ON / OFF します。
scrollEnabledprops にコンテンツの高さが大きい時だけにtrueになるように設定します。... const scrollEnabled = ctxHeight > window.height; ... <ScrollView scrollEnabled={scrollEnabled} // 追加 onContentSizeChange={handleContentSizeChange} > ... - Step 5動作を確認します。
<Text style={styles.text}>App</Text>に長いテキストを適宜追加してからテストを行います。※ テスト方法:(
StyleSheet内 )
1)containerのflexGrow→flex→flexGrowに変更しながらテスト、
2)textのfontSizeを 42 → 12 → 42 に変更しながらテストします。↓最終版
// App.js

import React, { memo } from "react";
import {
  StyleSheet,
  Text,
  ScrollView,
  SafeAreaView,
  useWindowDimensions
} from "react-native";
const App = () => {
  const window = useWindowDimensions();
  const [ctxHeight, setCtxHeight] = React.useState(0);
  const handleContentSizeChange = (contentWidth, contentHeight) => {
    setCtxHeight(contentHeight);
  };
  const scrollEnabled = ctxHeight > window.height;
  console.log("-----------------------");
  console.log("!@# window.height: ", window.height);
  console.log("!@# contentHeight: ", ctxHeight);
  console.log("!@# scrollEnabled: ", scrollEnabled);
  return (
    <SafeAreaView style={styles.container}>
      <ScrollView
        scrollEnabled={scrollEnabled}
        onContentSizeChange={handleContentSizeChange}
        style={styles.scrollView}
      >
        <Text style={styles.text}>
          Lorem Ipsum is simply dummy text of the printing and typesetting
          industry. Lorem Ipsum has been the industry's standard dummy text ever
          since the 1500s, when an unknown printer took a galley of type and
          scrambled it to make a type specimen book. It has survived not only
          five centuries, but also the leap into electronic typesetting,
          remaining essentially unchanged. It was popularised in the 1960s with
          the release of Letraset sheets containing Lorem Ipsum passages, and
          more recently with desktop publishing software like Aldus PageMaker
          including versions of Lorem Ipsum. The standard chunk of Lorem Ipsum
          used since the 1500s is reproduced below for those interested.
          Sections 1.10.32 and 1.10.33 from de Finibus Bonorum et Malorum by
          Cicero are also reproduced in their exact original form, accompanied
          by English versions from the 1914 translation by H. Rackham.
        </Text>
      </ScrollView>
    </SafeAreaView>
  );
};

const styles = StyleSheet.create({
  container: {
    flexGrow: 1
  },
  scrollView: {
    flex: 1,
    backgroundColor: "pink",
    alignItems: "center",
    justifyContent: "center"
  },
  text: {
    fontSize: 42
  }
});
export default memo(App);
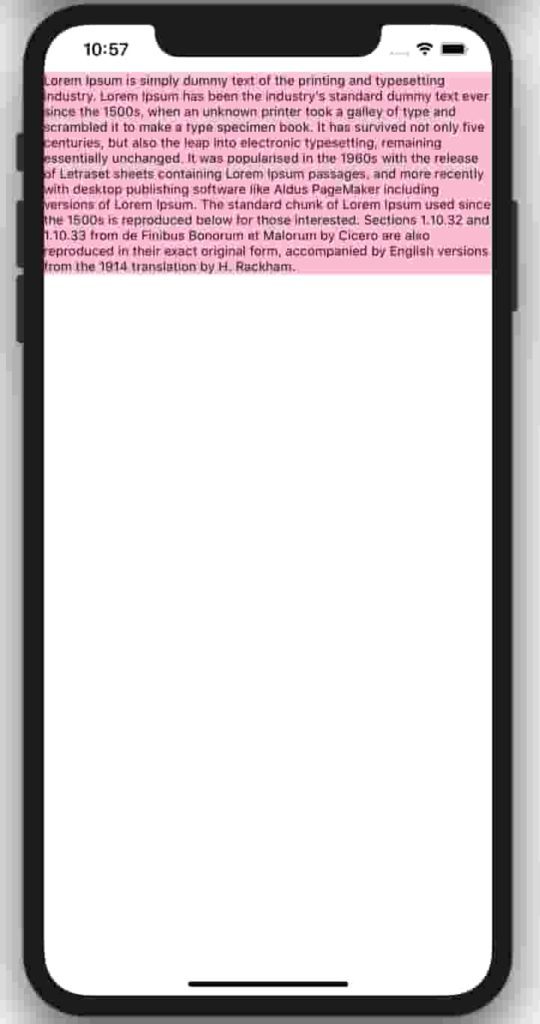
・window.height: 896
・contentHeight: 186.333328
・scrollEnabled: false

・window.height: 896
・contentHeight: 2155.33325
・scrollEnabled: true
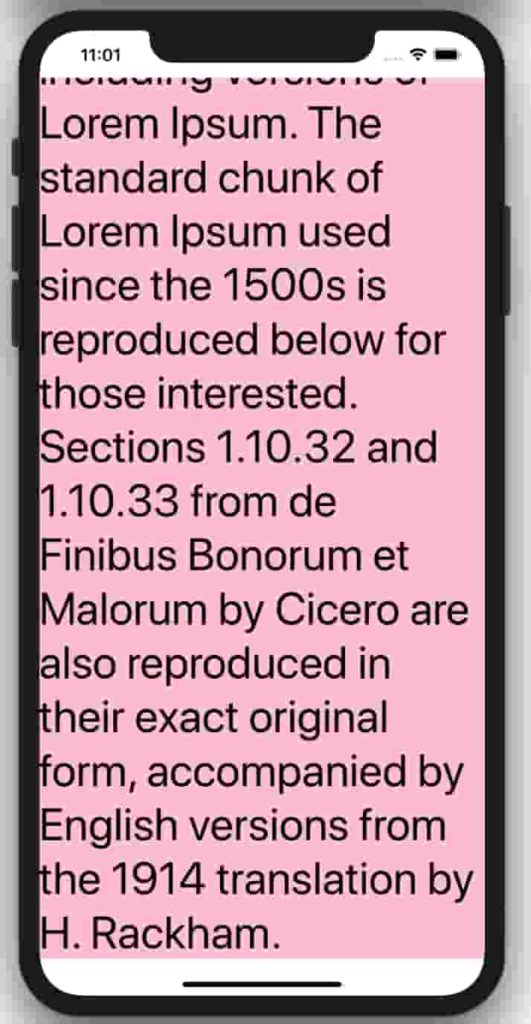
・window.height: 896
・contentHeight: 2155.33325
・scrollEnabled: true
判定をより正確にする(2026 年 7 月 追記)
この記事で使っている onContentSizeChange と scrollEnabled は、現在も同じように使えます。API は変わっていません。
ただし、実際のアプリに組み込むと判定がずれることがあります。理由と対処を書いておきます。
画面の高さと、ScrollView の高さは別物です
本文では次のように判定しています。
const scrollEnabled = ctxHeight > window.height;useWindowDimensions() が返すのは画面全体の高さです。一方、ScrollView が実際に表示に使える高さは、そこからいろいろ引かれた値になります。
- ステータスバーやホームインジケータの領域
- ナビゲーションのヘッダー
- 下部のタブバー
- キーボードが出ているときはその高さも
この記事のサンプルのように ScrollView が画面いっぱいに広がっている場合は、ほぼ一致するので問題になりません。しかしヘッダーやタブバーのある画面に組み込むと、実際にははみ出しているのにスクロールが効かないという状態になります。原因が分かりにくいので、覚えておくと役に立ちます。
ScrollView 自身の高さを測る
確実なのは、画面の高さではなく ScrollView そのものの高さと比べることです。onLayout で取れます。
const [ctxHeight, setCtxHeight] = useState(0);
const [viewHeight, setViewHeight] = useState(0);

const scrollEnabled = ctxHeight > viewHeight;

<ScrollView
  scrollEnabled={scrollEnabled}
  onContentSizeChange={(w, h) => setCtxHeight(h)}
  onLayout={(e) => setViewHeight(e.nativeEvent.layout.height)}
  contentContainerStyle={styles.scrollView}
>
これなら、その ScrollView がどこに置かれていても正しく判定できます。画面の高さを取得する必要もなくなるので、useWindowDimensions の import も不要になります。
SafeAreaView について
本文では react-native から SafeAreaView を import しています。これはiOS でのみ動作し、Android では何もしません。
両方のプラットフォームで余白を扱いたい場合は、react-native-safe-area-context の SafeAreaView を使います。上部だけ・下部だけといった指定もできます。Expo の公式サンプルでも、現在はこちらが使われています。
※ 本節は本文に掲載したコードを読み直して整理したものです。改めて動作検証を行ったものではありません。
まとめ
React Native で ScrollView を使うときは parent に {flexGrow:1} を設定することでiOS/Android 両方スクロールが正常に動作します。
コンテンツの高さとスクリーンの高さを比較することで、スクロール機能を必要な時だけ ON にすることができました。


コメント