
現状・条件
- この記事は Expo.io 開発 PF を使用して React Native を学習する為の自分参考用の記録です。よって、内容は随時変更される可能性があります。
- 公式サイトの文書をベースに「やってみた」と「学んだ」ことを書いています。
- Expo.io で React Native 開発環境を構築する〜macOS〜 << 記事のように開発環境を設定しておきます。
プロジェクトを作成する
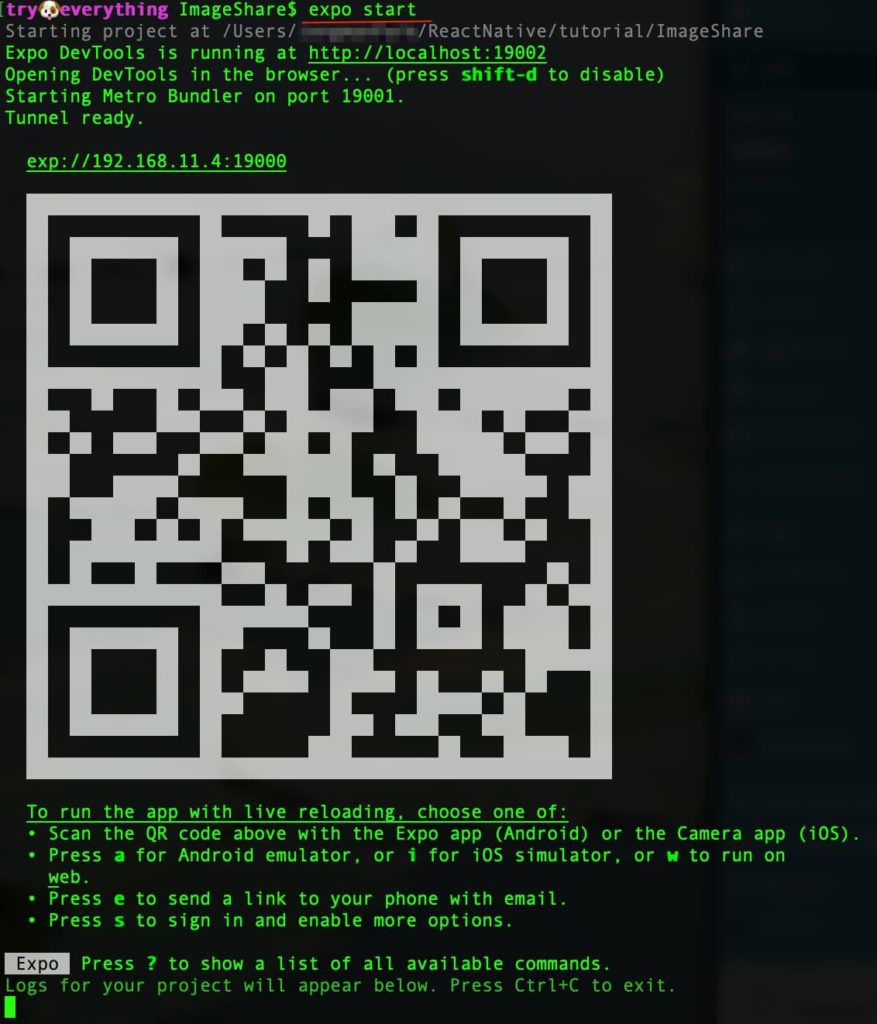
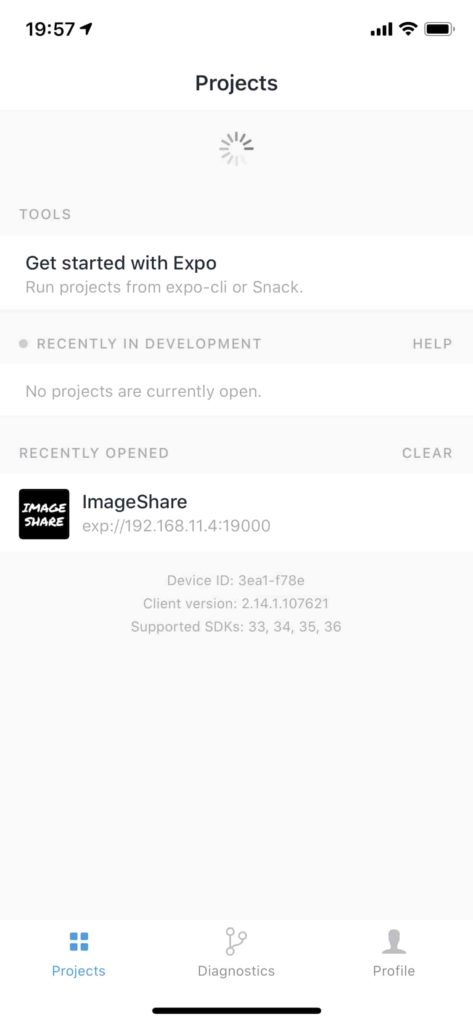
expo init ImageShare を実行して ImageShare という名でプロジェクトを作成します。
try🐶everything ~$ mkdir -p ReactNative/tutorial
try🐶everything ~$ cd ReactNative/tutorial
try🐶everything tutorial$ expo init ImageShare

インストールが完了したら、Expo を expo start で起動します。
警告が出たら Ctrl+C で Expo を止めます。
# 警告:
opendir(/Users/rnuser/Library/Caches/CloudKit) -> Operation not permitted. Marking this portion of the tree deletedTo clear this warning, run:watchman watch-del /Users/rnuser ; watchman watch-project /Users/rnuser
# 対処:結果画面まで少し時間が掛かります!
try🐶everything ImageShare$ watchman watch-del /Users/rnuser ; watchman watch-project /Users/rnuser
{
    "version": "4.9.0",
    "watch-del": true,
    "root": "/Users/rnuser"
}
{
    "version": "4.9.0",
    "warning": "opendir(/Users/rnuser/Library/Caches/CloudKit) -> Operation not permitted. Marking this portion of the tree deleted\nTo clear this warning, run:\n`watchman watch-del /Users/rnuser ; watchman watch-project /Users/rnuser`\n",
    "watch": "/Users/rnuser",
    "watcher": "fsevents"
}
まだ、警告メッセージが消えていない ↑↑↑
特定のプロジェクトだけをモニタリングするように変更します。
# 管理者権限でjsonファイルを作成します。
try🐶everything ~$ sudo vi /etc/watchman.json
try🐶everything ~$ cat /etc/watchman.json
{
  "root_files": [".watchmanconfig"]
}
try🐶everything ~$

# 該当プロジェクトへ移動し、設定ファイルを作成します。
try🐶everything ~$ cd ReactNative/tutorial/ImageShare/
try🐶everything ImageShare$
try🐶everything ImageShare$ echo '{}' > .watchmanconfig

# watchmanサーバを再起動します。
try🐶everything ImageShare$ watchman watch-del-all
try🐶everything ImageShare$ watchman shutdown-server; watchman watch-list
{
    "version": "4.9.0",
    "shutdown-server": true
}
{
    "version": "4.9.0",
    "roots": [
        "/Users/rnuser"
    ]
}
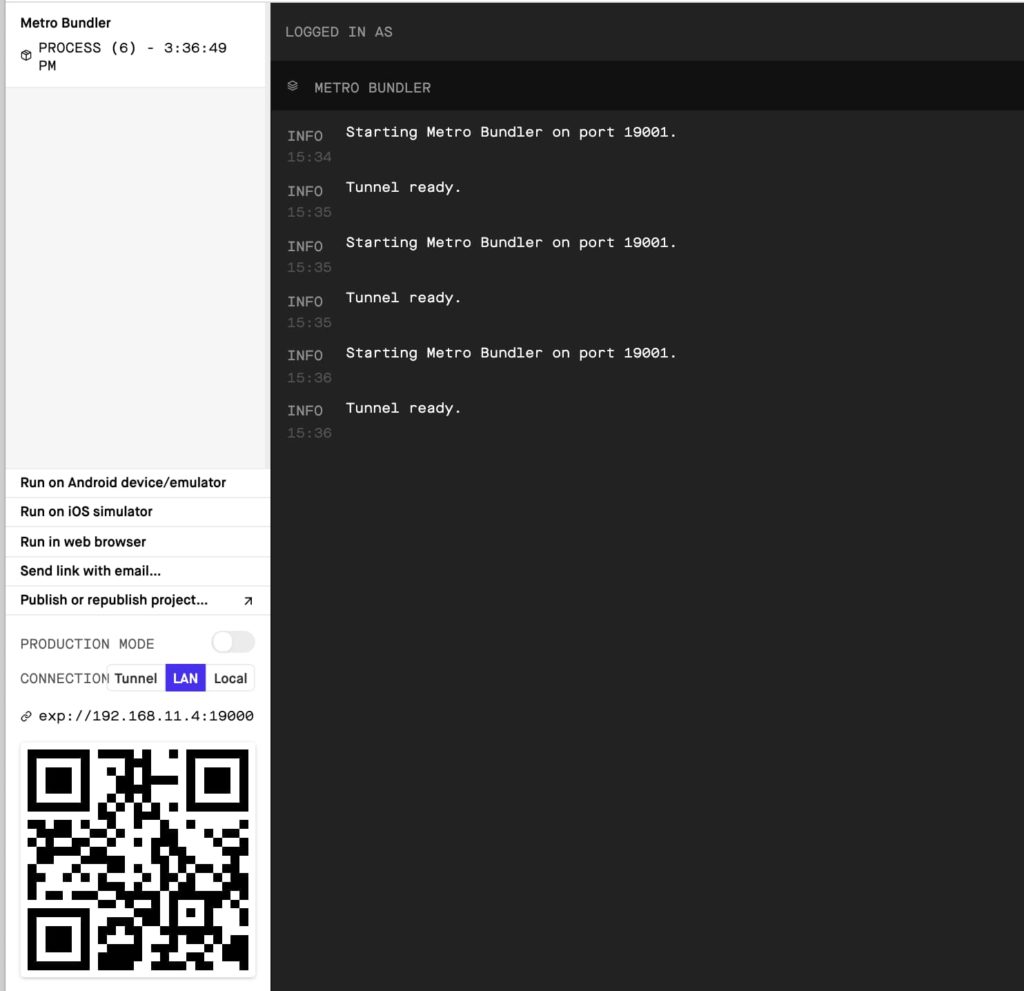
問題なければ、CLI と GUI の両方が起動されます。
新しいアプリを作成する
ImageShare プロジェクトが作成され、expo start を実行している状態で進めます。
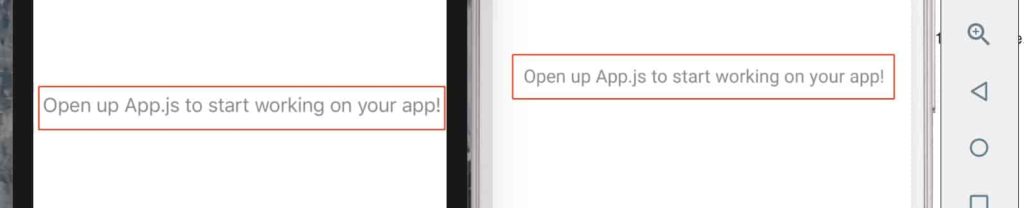
デバイス or エミュレータでプロジェクトを開き、使用中のコードエディターで App.js ファイルを開きます。
テキストにスタイルを適用します。
デフォルトの App.js ファイルには Text コンポーネント ( Line 7 ) にスタイルがない状態です。
import React from 'react';
import { StyleSheet, Text, View } from 'react-native';

export default function App() {
  return (
    <View style={styles.container}>
      <Text>Open up App.js to start working on your app!</Text>
    </View>
  );
}

const styles = StyleSheet.create({
  container: {
    flex: 1,
    backgroundColor: '#fff',
    alignItems: 'center',
    justifyContent: 'center',
  },
});

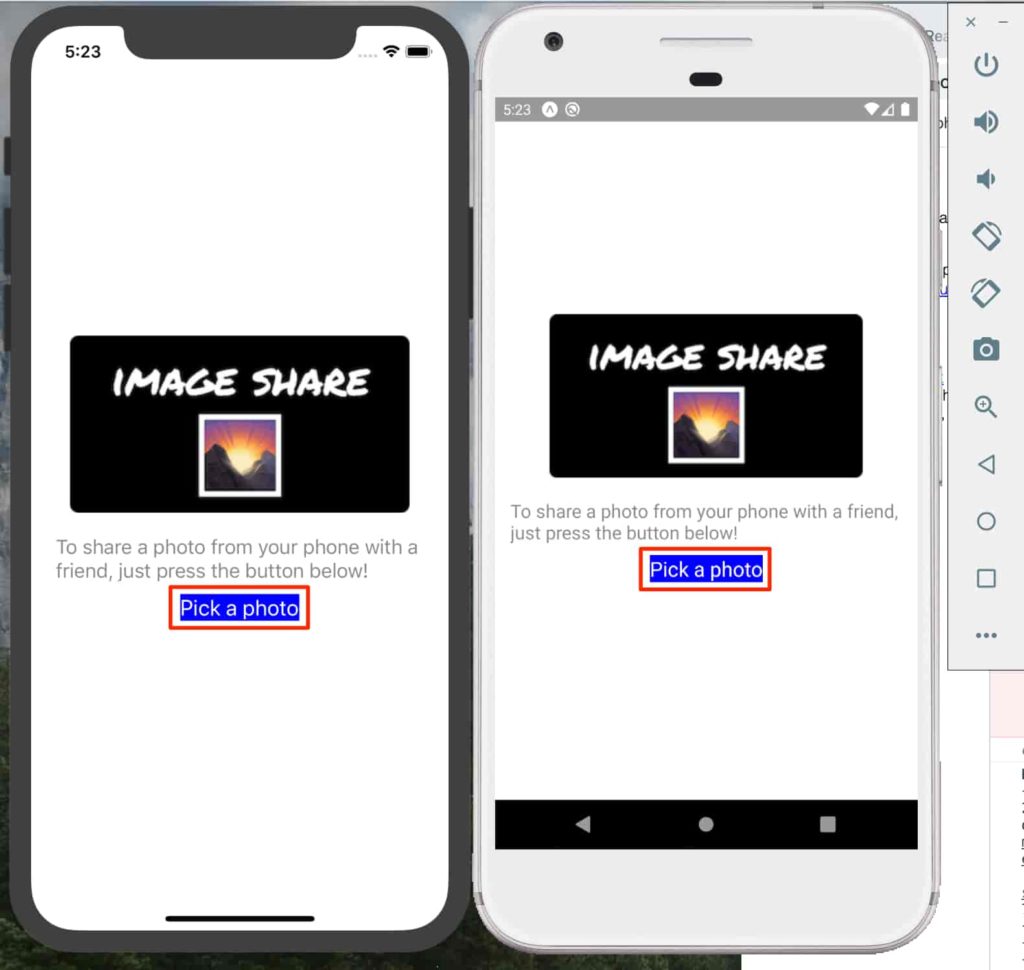
Text コンポーネントにスタイルを追加します。( Line 7 )
import React from 'react';
import { StyleSheet, Text, View } from 'react-native';

export default function App() {
  return (
    <View style={styles.container}>
      <Text style={{color: '#888', fontSize: 18}}>
        To share a photo from your phone with a friend, just press the button below!
      </Text>
    </View>
  );
}

const styles = StyleSheet.create({
  container: {
    flex: 1,
    backgroundColor: '#fff',
    alignItems: 'center',
    justifyContent: 'center',
  },
});
イメージを表示させる
ここ のイメージをダウンロードしてプロジェクトの assets ディレクトリ内に logo.png で保存します。
Image コンポーネントを使用してローカルファイルを表示させる為、Line 2、3、8 を下記のように追加します。
import React from 'react';
import { Image,  StyleSheet, Text, View } from 'react-native';
import logo from './assets/logo.png';

export default function App() {
  return (
    <View style={styles.container}>
      <Image source={logo} style={{ width: 305, height: 159 }} />

      <Text style={{color: '#888', fontSize: 18}}>
        To share a photo from your phone with a friend, just press the button below!
      </Text>
    </View>
  );
}

const styles = StyleSheet.create({
  container: {
    flex: 1,
    backgroundColor: '#fff',
    alignItems: 'center',
    justifyContent: 'center',
  },
});
URL からイメージを表示させるには、{ uri: 'http://path-to-your-image' } 属性を使います。上記の Line 8 を下記のように書き換えれば、リモートからイメージを読み込めます。
<Image source={{ uri: "https://i.imgur.com/TkIrScD.png" }} style={{ width: 305, height: 159 }} />
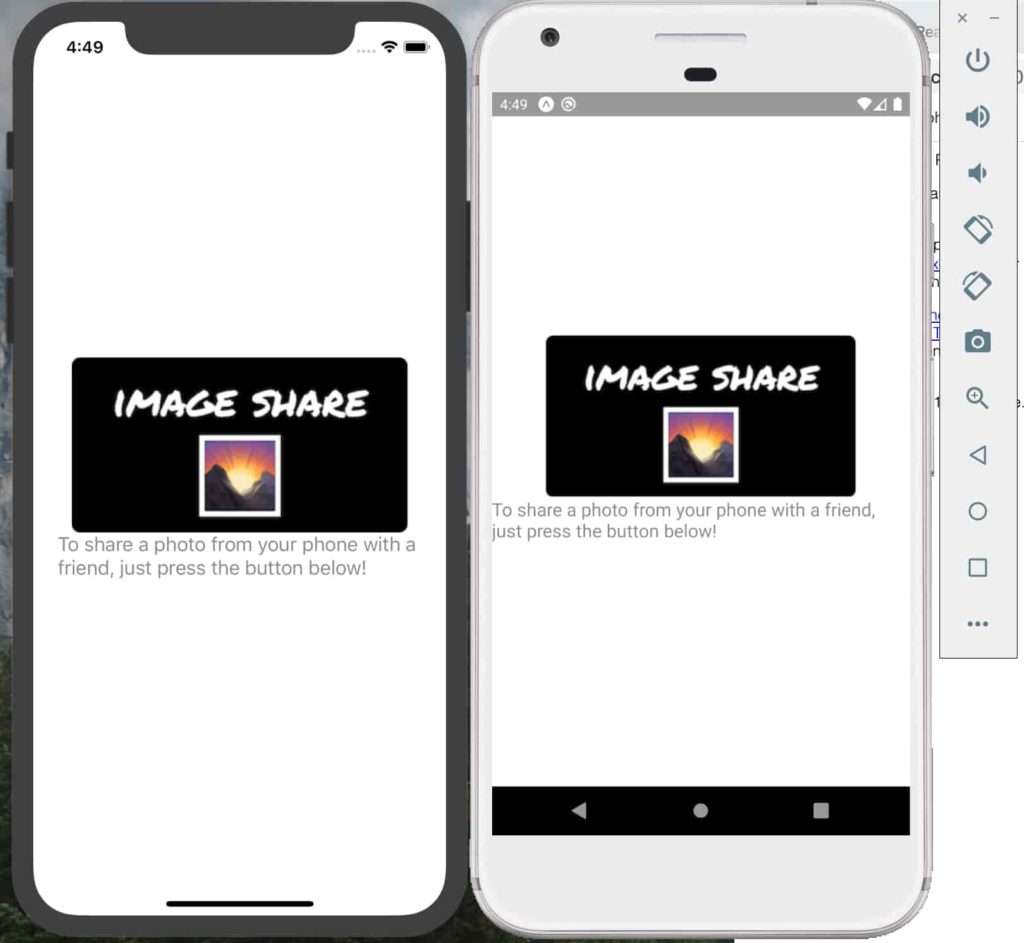
スタイルを一箇所にまとめます。
Line 9、12、27 – 36 を変更または追加します。
import React from "react";
import { Image, StyleSheet, Text, View } from "react-native";

export default function App() {
  return (
    <View style={styles.container}>
      <Image
        source={{ uri: "https://i.imgur.com/TkIrScD.png" }}
        style={styles.logo}
      />

      <Text style={styles.instructions}>
        To share a photo from your phone with a friend, just press the button
        below!
      </Text>
    </View>
  );
}

const styles = StyleSheet.create({
  container: {
    flex: 1,
    backgroundColor: "#fff",
    alignItems: "center",
    justifyContent: "center"
  },
  logo: {
    width: 305,
    height: 159,
    marginBottom: 10
  },
  instructions: {
    color: "#888",
    fontSize: 18,
    marginHorizontal: 15
  }
});
ボタンを作成する
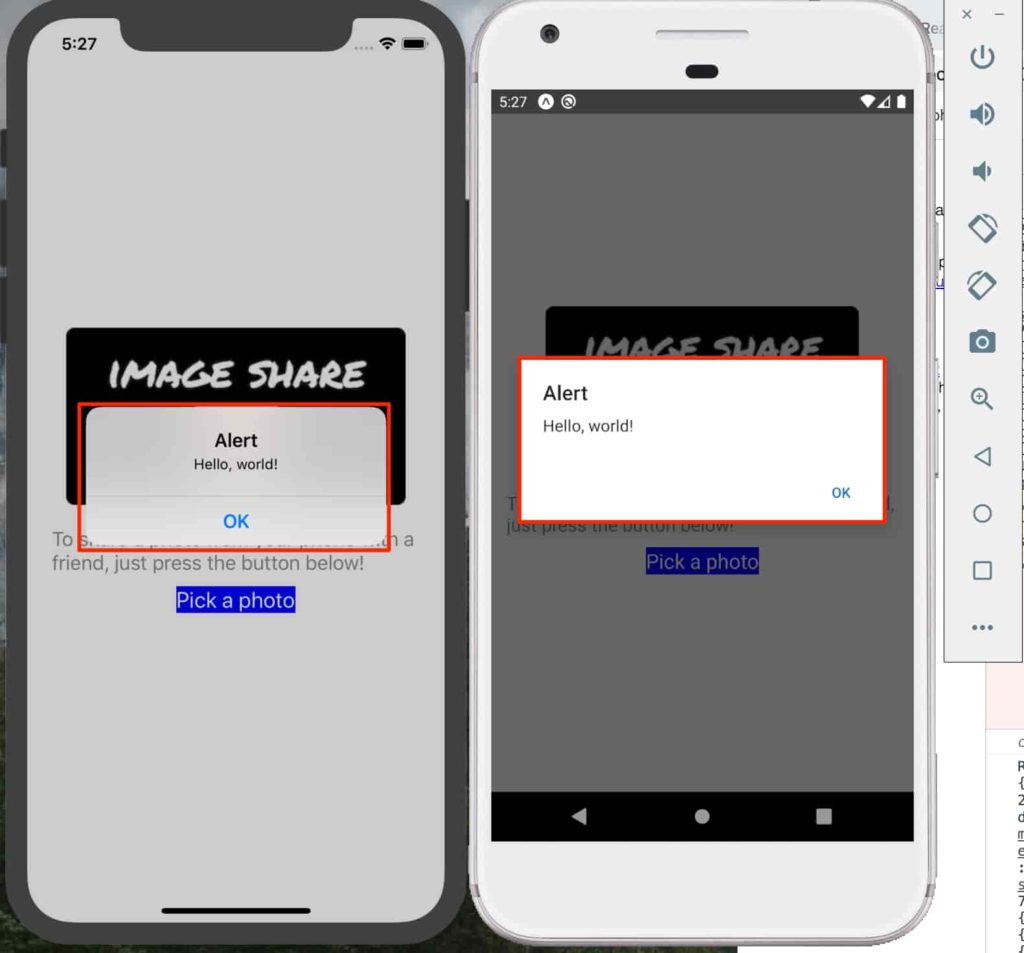
TouchableOpacity と Text コンポーネントを使用してボタンを追加します。
ボタンをクリックすると、Alert が表示されます。Line 2、 16 – 21 を追加します。
import React from "react";
import { Image, StyleSheet, Text, TouchableOpacity, View } from "react-native";

export default function App() {
  return (
    <View style={styles.container}>
      <Image
        source={{ uri: "https://i.imgur.com/TkIrScD.png" }}
        style={styles.logo}
      />
      <Text style={styles.instructions}>
        To share a photo from your phone with a friend, just press the button
        below!
      </Text>

      <TouchableOpacity
        onPress={() => alert("Hello, world!")}
        style={{ backgroundColor: "blue" }}
      >
        <Text style={{ fontSize: 20, color: "#fff" }}>Pick a photo</Text>
      </TouchableOpacity>
    </View>
  );
}

const styles = StyleSheet.create({
  container: {
    flex: 1,
    backgroundColor: "#fff",
    alignItems: "center",
    justifyContent: "center"
  },
  logo: {
    width: 305,
    height: 159,
    marginBottom: 20
  },
  instructions: {
    color: "#888",
    fontSize: 18,
    marginHorizontal: 15,
    marginBottom: 10
  }
});
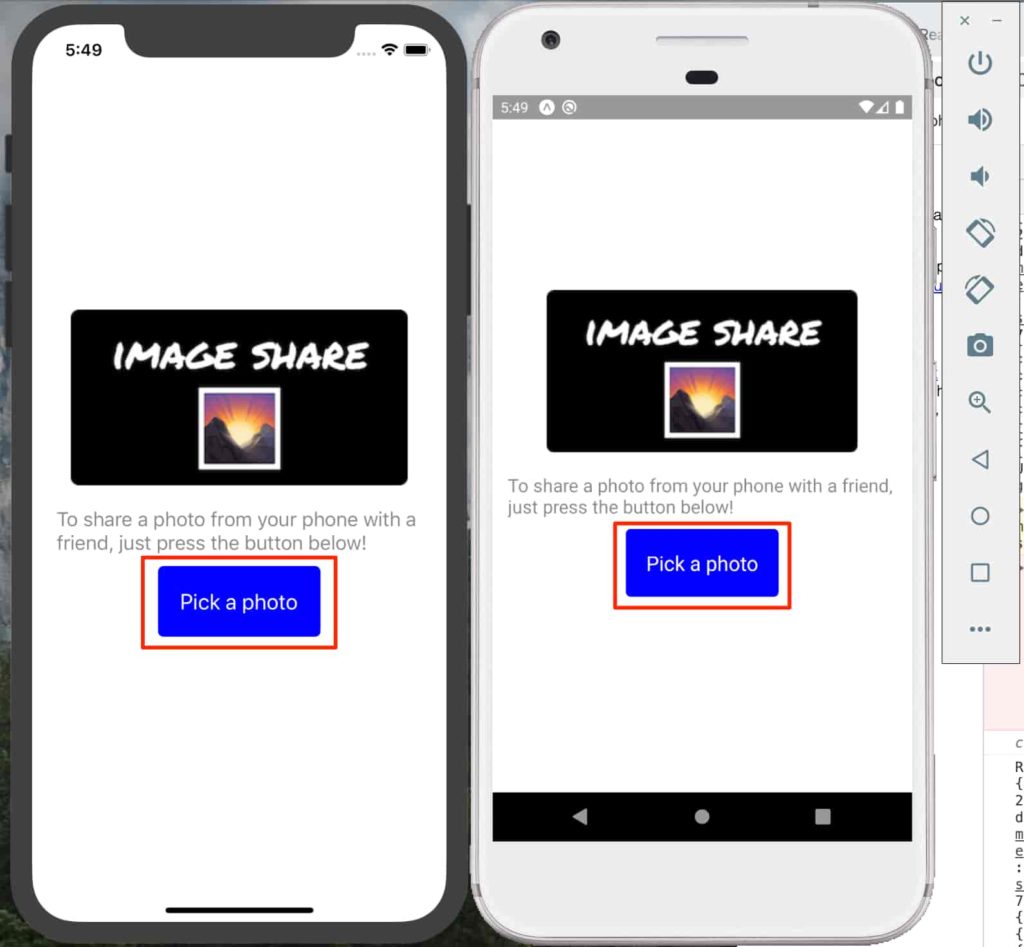
ボタンをクリックしやすくする
TouchableOpacity に padding を追加してボタンをより大きく表示させます。
Line 18、20、44 – 52 のように追加します。
import React from "react";
import { Image, StyleSheet, Text, TouchableOpacity, View } from "react-native";

export default function App() {
  return (
    <View style={styles.container}>
      <Image
        source={{ uri: "https://i.imgur.com/TkIrScD.png" }}
        style={styles.logo}
      />
      <Text style={styles.instructions}>
        To share a photo from your phone with a friend, just press the button
        below!
      </Text>

      <TouchableOpacity
        onPress={() => alert("Hello, world!")}
        style={styles.button}
      >
        <Text style={styles.buttonText}>Pick a photo</Text>
      </TouchableOpacity>
    </View>
  );
}

const styles = StyleSheet.create({
  container: {
    flex: 1,
    backgroundColor: "#fff",
    alignItems: "center",
    justifyContent: "center"
  },
  logo: {
    width: 305,
    height: 159,
    marginBottom: 20
  },
  instructions: {
    color: "#888",
    fontSize: 18,
    marginHorizontal: 15,
    marginBottom: 10
  },
  button: {
    backgroundColor: "blue",
    padding: 20,
    borderRadius: 5
  },
  buttonText: {
    fontSize: 20,
    color: "#fff"
  }
});
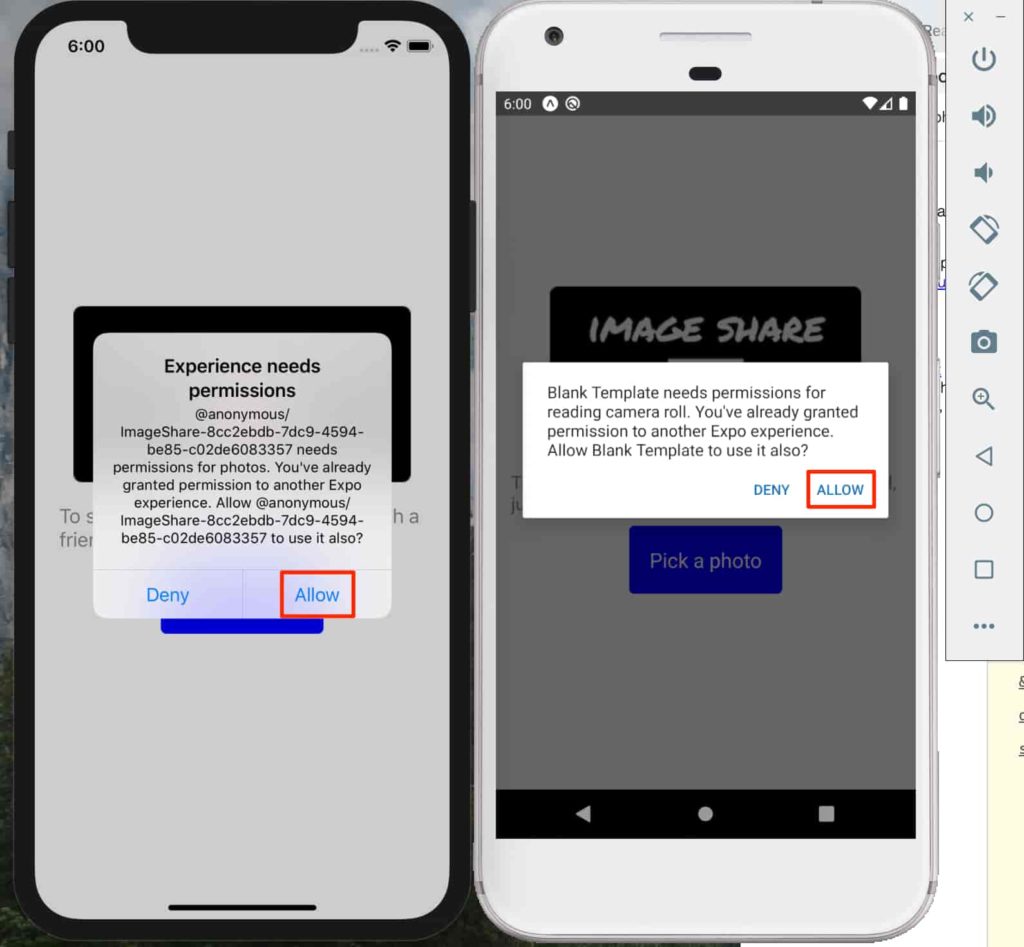
イメージファイルをアップロードする
React Native には Image Picker がない為、Expo ライブラリーである、expo-image-picker を使用します。expo install expo-image-picker を実行してインストールします。
try🐶everything ImageShare$ expo install expo-image-picker
Installing 1 SDK 36.0.0 compatible native module using Yarn.
> yarn add expo-image-picker@~8.0.1
yarn add v1.21.1
[1/4] 🔍  Resolving packages...
[2/4] 🚚  Fetching packages...
[3/4] 🔗  Linking dependencies...
[4/4] 🔨  Building fresh packages...
success Saved lockfile.
success Saved 1 new dependency.
info Direct dependencies
└─ expo-image-picker@8.0.2
info All dependencies
└─ expo-image-picker@8.0.2
✨  Done in 10.28s.
try🐶everything ImageShare$
Line 3、6-16、29 を追加します。
import React from "react";
import { Image, StyleSheet, Text, TouchableOpacity, View } from "react-native";
import * as ImagePicker from "expo-image-picker";

export default function App() {
  let openImagePickerAsync = async () => {
    let permissionResult = await ImagePicker.requestCameraRollPermissionsAsync();

    if (permissionResult.granted === false) {
      alert("Permission to access camera roll is required!");
      return;
    }

    let pickerResult = await ImagePicker.launchImageLibraryAsync();
    console.log(pickerResult);
  };

  return (
    <View style={styles.container}>
      <Image
        source={{ uri: "https://i.imgur.com/TkIrScD.png" }}
        style={styles.logo}
      />
      <Text style={styles.instructions}>
        To share a photo from your phone with a friend, just press the button
        below!
      </Text>

      <TouchableOpacity onPress={openImagePickerAsync} style={styles.button}>
        <Text style={styles.buttonText}>Pick a photo</Text>
      </TouchableOpacity>
    </View>
  );
}

const styles = StyleSheet.create({
  container: {
    flex: 1,
    backgroundColor: "#fff",
    alignItems: "center",
    justifyContent: "center"
  },
  logo: {
    width: 305,
    height: 159,
    marginBottom: 20
  },
  instructions: {
    color: "#888",
    fontSize: 18,
    marginHorizontal: 15,
    marginBottom: 10
  },
  button: {
    backgroundColor: "blue",
    padding: 20,
    borderRadius: 5
  },
  buttonText: {
    fontSize: 20,
    color: "#fff"
  }
});
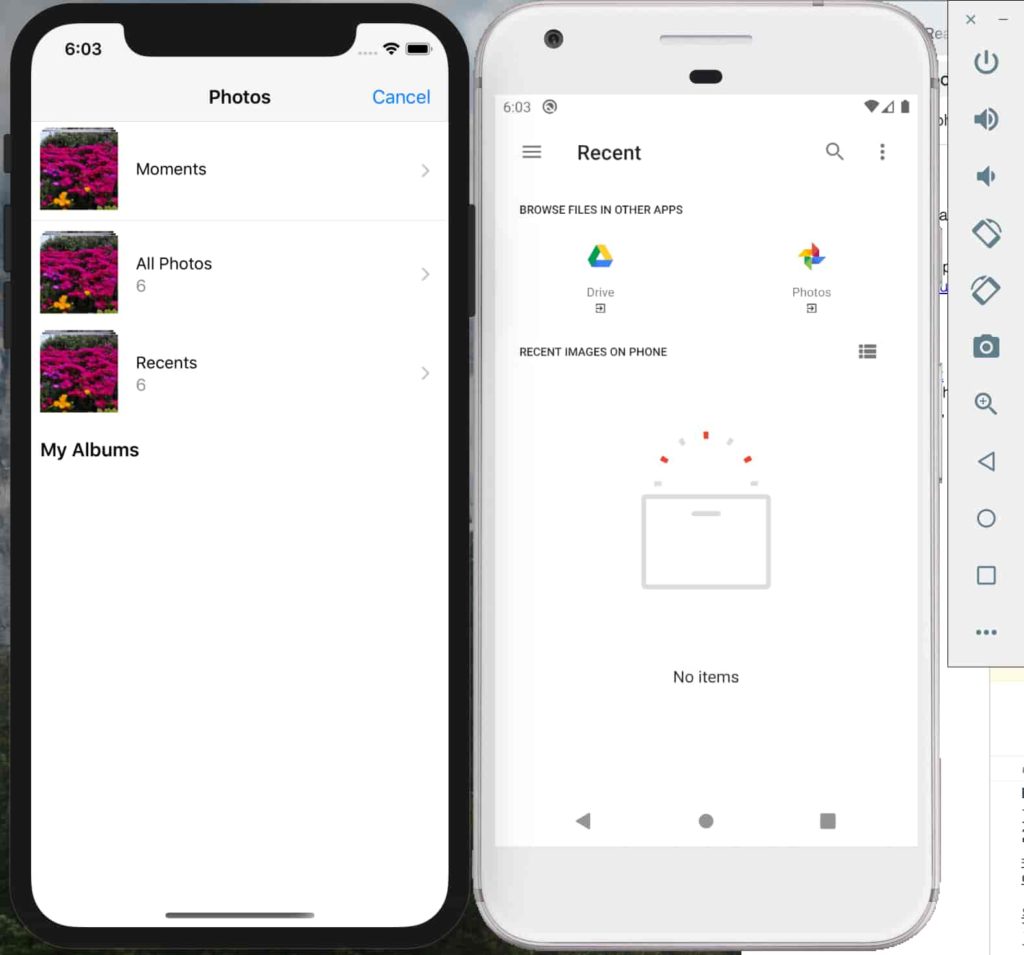
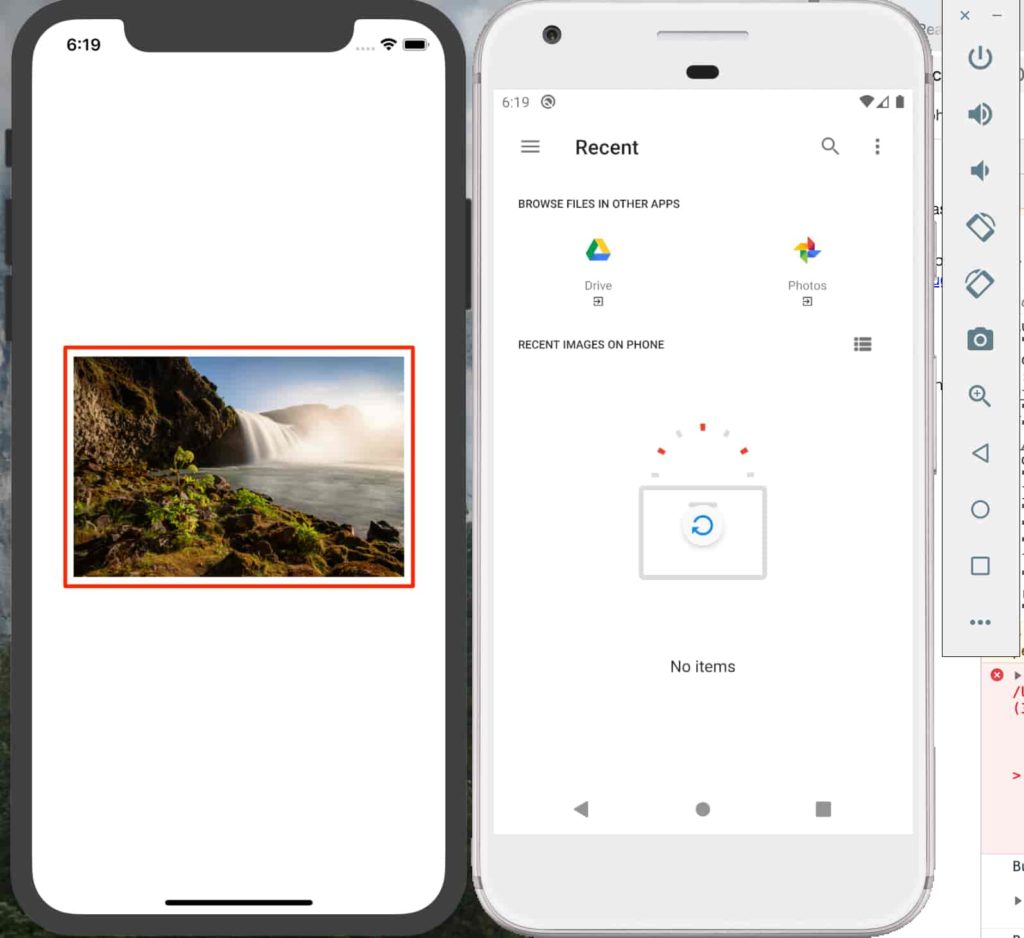
Camera Roll へのアクセスを許可します。
また、Expo CLI のコンソールメッセージには、 console.log(pickerResult); による選択したイメージの情報が表示されます。
この後、その uri 情報を使用してイメージをシェアすることになります。
...
Object {
  "cancelled": true,
}
Object {
  "cancelled": false,
  "height": 2848,
  "type": "image",
  "uri": "file:///Users/rnuser/Library/Developer/CoreSimulator/Devices/7A4C28CE-FD9B-4D36-80A0-5B98DB9BD830/data/Containers/Data/Application/7C0259CB-6C3C-4EE8-A191-52AECBF410F3/Library/Caches/ExponentExperienceData/%2540anonymous%252FImageShare-8cc2ebdb-7dc9-4594-be85-c02de6083357/ImagePicker/B0A2F03A-E9E4-48C3-99BA-1C529CC283AA.jpg",
  "width": 4288,
}
選択したイメージを使用する
React.useState() が関数コンポーネントでも使えてクラスを書かずに State などを使えるのは大変嬉しいこと。( 詳細は ここ をご参考ください )
Line 6、18 – 34、81 – 85 を追加します。
import React from "react";
import { Image, StyleSheet, Text, TouchableOpacity, View } from "react-native";
import * as ImagePicker from "expo-image-picker";

export default function App() {
  let [selectedImage, setSelectedImage] = React.useState(null);

  let openImagePickerAsync = async () => {
    let permissionResult = await ImagePicker.requestCameraRollPermissionsAsync();

    if (permissionResult.granted === false) {
      alert("Permission to access camera roll is required!");
      return;
    }

    let pickerResult = await ImagePicker.launchImageLibraryAsync();

   if (pickerResult.cancelled === true) {
      return;
    }

    setSelectedImage({ localUri: pickerResult.uri });
  };

  if (selectedImage !== null) {
    return (
      <View style={styles.container}>
        <Image
          source={{ uri: selectedImage.localUri }}
          style={styles.thumbnail}
        />
      </View>
    );
  }

  return (
    <View style={styles.container}>
      <Image
        source={{ uri: "https://i.imgur.com/TkIrScD.png" }}
        style={styles.logo}
      />
      <Text style={styles.instructions}>
        To share a photo from your phone with a friend, just press the button
        below!
      </Text>

      <TouchableOpacity onPress={openImagePickerAsync} style={styles.button}>
        <Text style={styles.buttonText}>Pick a photo</Text>
      </TouchableOpacity>
    </View>
  );
}

const styles = StyleSheet.create({
  container: {
    flex: 1,
    backgroundColor: "#fff",
    alignItems: "center",
    justifyContent: "center"
  },
  logo: {
    width: 305,
    height: 159,
    marginBottom: 20
  },
  instructions: {
    color: "#888",
    fontSize: 18,
    marginHorizontal: 15,
    marginBottom: 10
  },
  button: {
    backgroundColor: "blue",
    padding: 20,
    borderRadius: 5
  },
  buttonText: {
    fontSize: 20,
    color: "#fff"
  },
  thumbnail: {
    width: 300,
    height: 300,
    resizeMode: "contain"
  }
});
イメージをシェアする
expo-image-picker のようにイメージをシェアする為、Expo ライブラリーである expo-sharing を使用します。まず、インストールから。。
try🐶everything ImageShare$ expo install expo-sharing
Installing 1 SDK 36.0.0 compatible native module using Yarn.
> yarn add expo-sharing@~8.0.0
yarn add v1.21.1
[1/4] 🔍  Resolving packages...
[2/4] 🚚  Fetching packages...
[3/4] 🔗  Linking dependencies...
[4/4] 🔨  Building fresh packages...
success Saved lockfile.
success Saved 1 new dependency.
info Direct dependencies
└─ expo-sharing@8.0.0
info All dependencies
└─ expo-sharing@8.0.0
✨  Done in 5.77s.
try🐶everything ImageShare$
Line 4、26 – 33、42 – 45 まで追加します。
import React from "react";
import { Image, StyleSheet, Text, TouchableOpacity, View } from "react-native";
import * as ImagePicker from "expo-image-picker";
import * as Sharing from "expo-sharing";
export default function App() {
let [selectedImage, setSelectedImage] = React.useState(null);
let openImagePickerAsync = async () => {
let permissionResult = await ImagePicker.requestCameraRollPermissionsAsync();
if (permissionResult.granted === false) {
alert("Permission to access camera roll is required!");
return;
}
let pickerResult = await ImagePicker.launchImageLibraryAsync();
if (pickerResult.cancelled === true) {
return;
}
setSelectedImage({ localUri: pickerResult.uri });
};
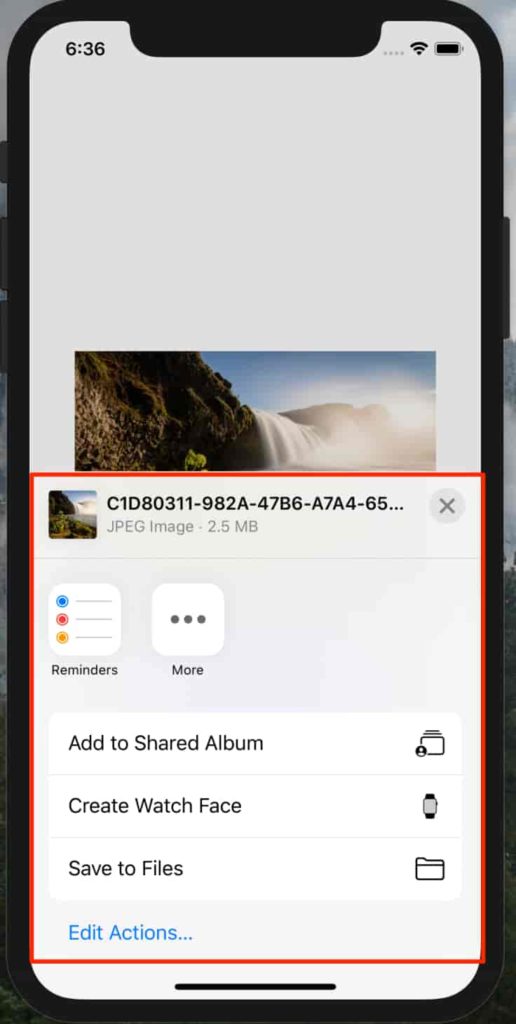
let openShareDialogAsync = async () => {
if (!(await Sharing.isAvailableAsync())) {
alert(`Uh oh, sharing isn't available on your platform`);
return;
}
Sharing.shareAsync(selectedImage.localUri);
};
if (selectedImage !== null) {
return (
<View style={styles.container}>
<Image
source={{ uri: selectedImage.localUri }}
style={styles.thumbnail}
/>
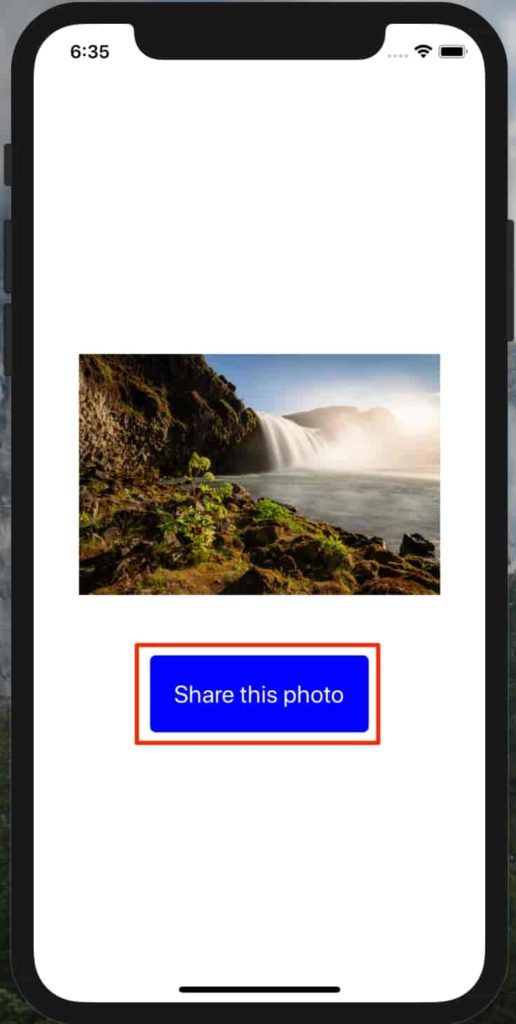
<TouchableOpacity onPress={openShareDialogAsync} style={styles.button}>
<Text style={styles.buttonText}>Share this photo</Text>
</TouchableOpacity>
</View>
);
}
return (
<View style={styles.container}>
<Image
source={{ uri: "https://i.imgur.com/TkIrScD.png" }}
style={styles.logo}
/>
<Text style={styles.instructions}>
To share a photo from your phone with a friend, just press the button
below!
</Text>
<TouchableOpacity onPress={openImagePickerAsync} style={styles.button}>
<Text style={styles.buttonText}>Pick a photo</Text>
</TouchableOpacity>
</View>
);
}
const styles = StyleSheet.create({
container: {
flex: 1,
backgroundColor: "#fff",
alignItems: "center",
justifyContent: "center"
},
logo: {
width: 305,
height: 159,
marginBottom: 20
},
instructions: {
color: "#888",
fontSize: 18,
marginHorizontal: 15,
marginBottom: 10
},
button: {
backgroundColor: "blue",
padding: 20,
borderRadius: 5
},
buttonText: {
fontSize: 20,
color: "#fff"
},
thumbnail: {
width: 300,
height: 300,
resizeMode: "contain"
}
});
プラットフォームの差異を処理する
Chrome ブラウザでは expo-sharing が動作しない為、その代案を適用します。anonymous-files を利用してデバイスのファイルをアップロードしその URL を共有する方法です。
expo install anonymous-files を実行します。
try🐶everything ImageShare$ expo install anonymous-files
Installing 1 other package using Yarn.
> yarn add anonymous-files
yarn add v1.21.1
[1/4] 🔍  Resolving packages...
[2/4] 🚚  Fetching packages...
[3/4] 🔗  Linking dependencies...
[4/4] 🔨  Building fresh packages...
success Saved lockfile.
success Saved 1 new dependency.
info Direct dependencies
└─ anonymous-files@1.0.1
info All dependencies
└─ anonymous-files@1.0.1
✨  Done in 5.95s.
try🐶everything ImageShare$
Line 2 – 9、12、29 – 34、40、45 を追加 or 編集します。
import React from "react";
import {
  Image,
  Platform,
  StyleSheet,
  Text,
  TouchableOpacity,
  View
} from "react-native";
import * as ImagePicker from "expo-image-picker";
import * as Sharing from "expo-sharing";
import uploadToAnonymousFilesAsync from "anonymous-files";

export default function App() {
  let [selectedImage, setSelectedImage] = React.useState(null);

  let openImagePickerAsync = async () => {
    let permissionResult = await ImagePicker.requestCameraRollPermissionsAsync();

    if (permissionResult.granted === false) {
      alert("Permission to access camera roll is required!");
      return;
    }

    let pickerResult = await ImagePicker.launchImageLibraryAsync();
    if (pickerResult.cancelled === true) {
      return;
    }
    if (Platform.OS === "web") {
      let remoteUri = await uploadToAnonymousFilesAsync(pickerResult.uri);
      setSelectedImage({ localUri: pickerResult.uri, remoteUri });
    } else {
      setSelectedImage({ localUri: pickerResult.uri, remoteUri: null });
    }
  };

  let openShareDialogAsync = async () => {
    if (!(await Sharing.isAvailableAsync())) {
      alert(
        `The image is available for sharing at: ${selectedImage.remoteUri}`
      );
      return;
    }

    Sharing.shareAsync(selectedImage.remoteUri || selectedImage.localUri);
  };

  if (selectedImage !== null) {
    return (
      <View style={styles.container}>
        <Image
          source={{ uri: selectedImage.localUri }}
          style={styles.thumbnail}
        />

        <TouchableOpacity onPress={openShareDialogAsync} style={styles.button}>
          <Text style={styles.buttonText}>Share this photo</Text>
        </TouchableOpacity>
      </View>
    );
  }

  return (
    <View style={styles.container}>
      <Image
        source={{ uri: "https://i.imgur.com/TkIrScD.png" }}
        style={styles.logo}
      />
      <Text style={styles.instructions}>
        To share a photo from your phone with a friend, just press the button
        below!
      </Text>

      <TouchableOpacity onPress={openImagePickerAsync} style={styles.button}>
        <Text style={styles.buttonText}>Pick a photo</Text>
      </TouchableOpacity>
    </View>
  );
}

const styles = StyleSheet.create({
  container: {
    flex: 1,
    backgroundColor: "#fff",
    alignItems: "center",
    justifyContent: "center"
  },
  logo: {
    width: 305,
    height: 159,
    marginBottom: 20
  },
  instructions: {
    color: "#888",
    fontSize: 18,
    marginHorizontal: 15,
    marginBottom: 10
  },
  button: {
    backgroundColor: "blue",
    padding: 20,
    borderRadius: 5
  },
  buttonText: {
    fontSize: 20,
    color: "#fff"
  },
  thumbnail: {
    width: 300,
    height: 300,
    resizeMode: "contain"
  }
});
確認します。
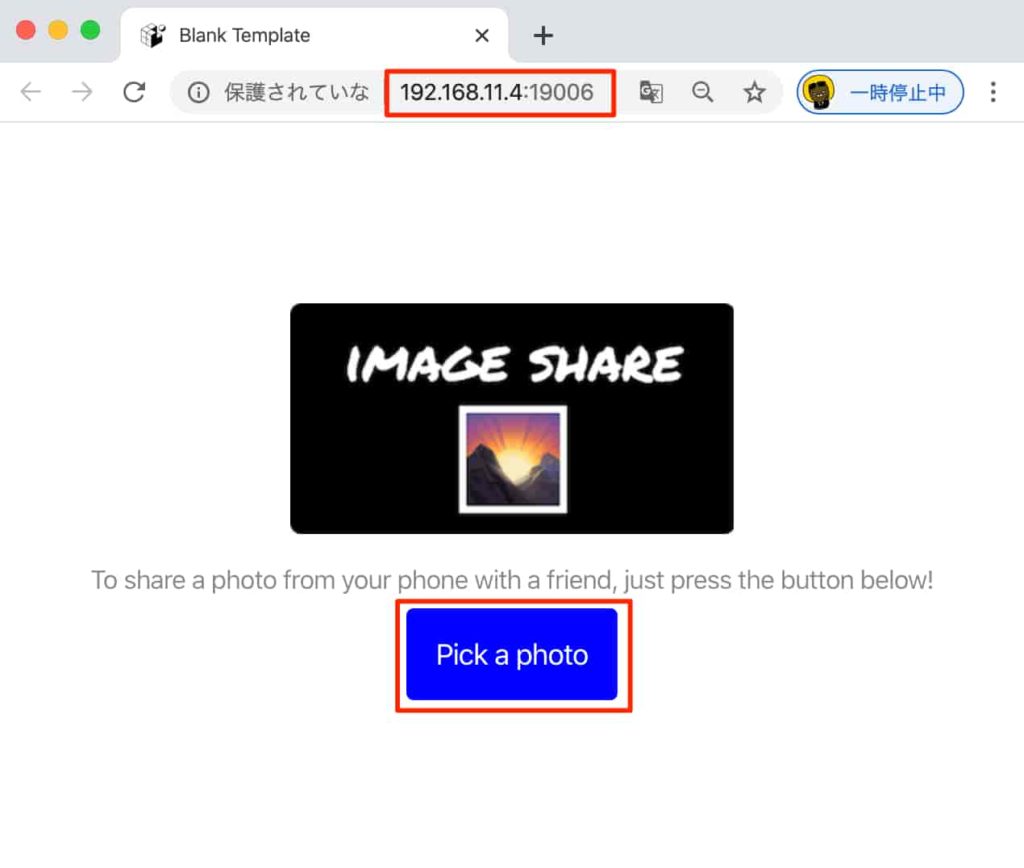
- Step 1デフォルトブラウザが Chrome になっていることを確かめてください。
Expo CLI のプロンプトから
wを押して WEB アプリを起動します。「Pick a photo」ボタンをクリックします。
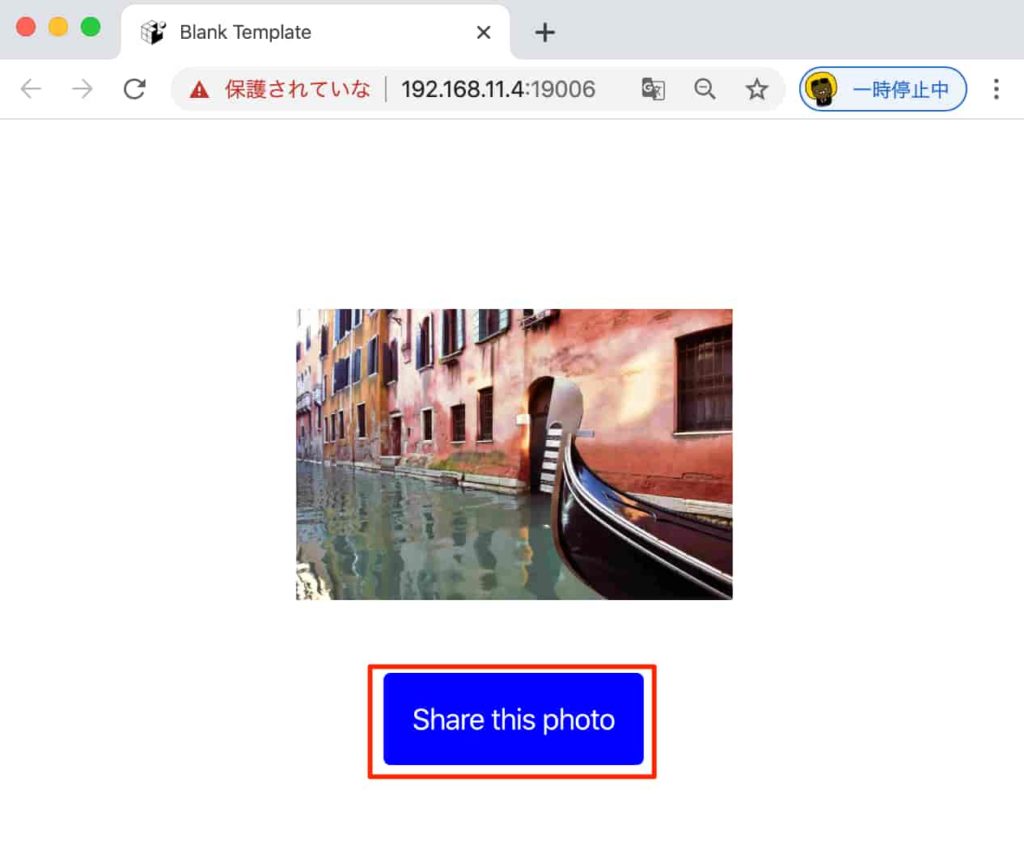
- Step 2ブラウザの画面から任意のイメージを選択して「Share this photo」ボタンをクリックします。
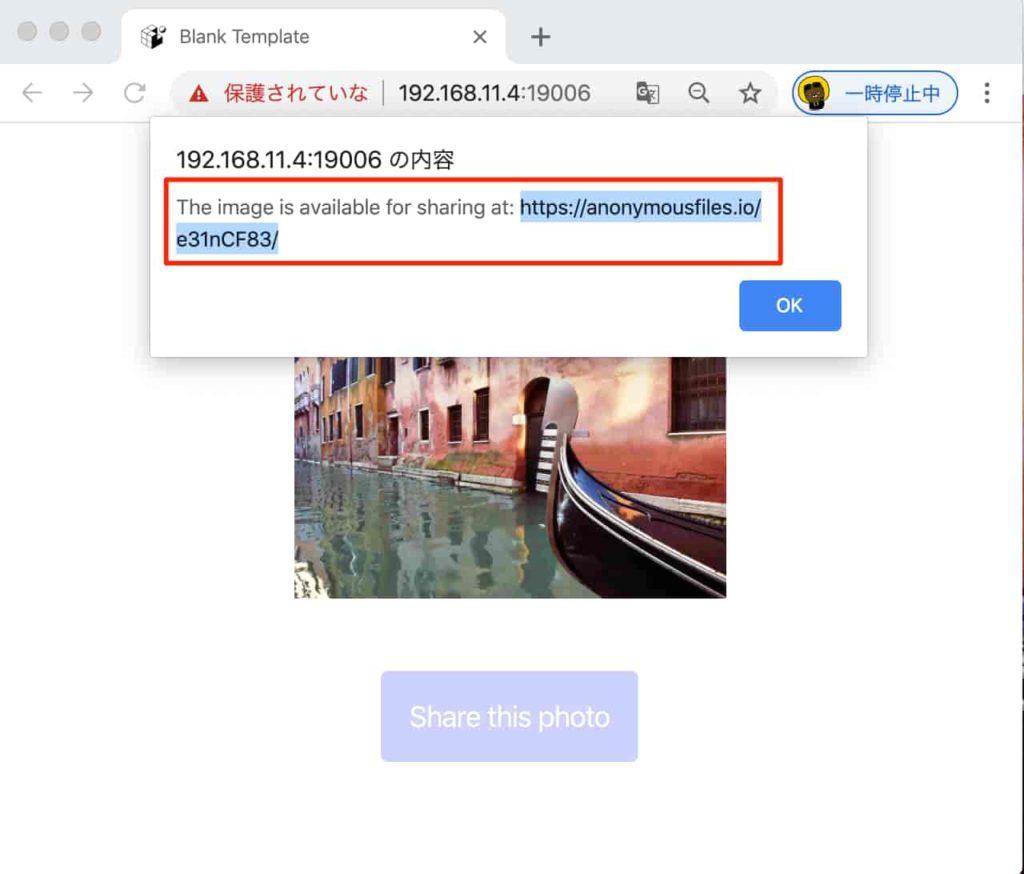
- Step 3
alertが表示されます。そのリンクをコピーします。
- Step 4コピーしたリンクをペーストして開きます。
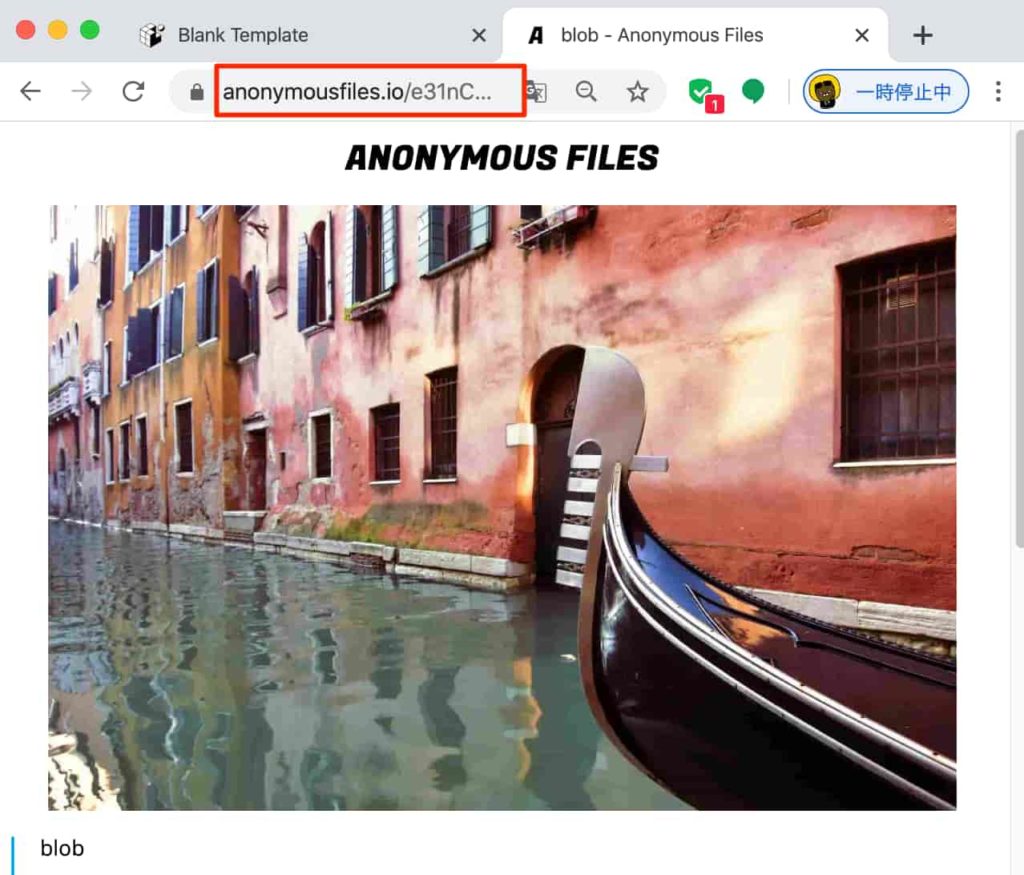
で、このリンクを共有することでイメージファイルをシェアできます。
ここまでで、イメージをシェアできました。
次は、アプリアイコン や スプラッシュスクリーン をカスタマイズします。
Splash Screen と App Icon をカスタマイズする
スプラッシュスクリーン
スプラッシュスクリーンのイメージ : 1242px X 2436px
splash.png をダウンロードしてプロジェクトの assets の中に保存します。
アプリをリロードするとスプラッシュスクリーンが表示されます。
保存した splash.png の背景色 ( 黒 ) にアプリのスプラッシュ設定を合わせておきます。app.json ファイルを開いて、splash セクションの backgroundColor を黒 ( #000000 ) に変更します。
...
    "splash": {
      "image": "./assets/splash.png",
      "resizeMode": "contain",
      "backgroundColor": "#000000"
    },
...
アプリアイコン
アプリアイコンのサイズ:1024px X 1024px
icon.png をダウンロードしてプロジェクトの assets の中に保存します。
アプリをリロードします。
あとがき
この記事は Expo Document をベースにしています。
より詳細な内容が読めるのでお時間ある方はぜひ行ってみていいと思います。
React にはある程度慣れていた為、あまり難しく感じることなくチュートリアルが出来てよかったです!


コメント