
この記事は Expo SDK 49 時点の記録です(2026 年 7 月 追記)
Expo Router でファイルベースルーティングを組む、という流れは今も同じです。ただし本文で設定している項目のうち 3 つが、現在は不要になっています。そのまま書くと警告が出るものもあるので、先にまとめます。
1. babel.config.js の expo-router/babel は削除してください
本文では次のように追加していますが、SDK 50 でこのプラグインは
babel-preset-expoに統合されました。plugins: ['expo-router/babel'], // ← SDK 50 以降は不要残しておくと、次のようなメッセージが出ます。
[BABEL]: expo-router/babel is deprecated in favor of babel-preset-expo in SDK 50. To fix this issue, remove "expo-router/babel" from "plugins" in your babel.config.js fileさらに言えば、ほかにカスタム設定がなければ
babel.config.jsというファイル自体が不要です。公式ドキュメントでも、必要なければ削除してよいと案内されています。プリセットはbabel-preset-expoが既定で使われます。なお、Babel の設定を変えたときは Metro のキャッシュを消して再起動してください。変更が反映されずに悩むことがあります。
2. experiments.tsconfigPaths も不要です
本文では
app.jsonに次を書いています。"experiments": {"tsconfigPaths": true} // ← SDK 50 以降は不要SDK 49 では「実験的機能」としてオプトインが必要でしたが、SDK 50 からは既定で有効です。書かなくても
tsconfig.jsonの paths が効きます。3. path alias は接頭辞を付ける形が案内されています
本文では次のように、すべてのインポートを
src配下に向けています。"paths": {"*": ["src/*"]}これでも動きますが、現在の公式ドキュメントでは接頭辞を付けた書き方が案内されています。
{ "extends": "expo/tsconfig.base", "compilerOptions": { "strict": true, "paths": { "@/*": ["./src/*"] } }, "include": ["**/*.ts", "**/*.tsx", ".expo/types/**/*.ts", "expo-env.d.ts"] }接頭辞があると、自分のコードなのか外部パッケージなのかが一目で分かります。
*をそのまま割り当てる形だと、パッケージ名と同じ名前のディレクトリをsrc配下に作ったときに解決先が紛らわしくなります。これから書くなら@/形式をおすすめします。
includeに.expo/typesとexpo-env.d.tsが入っている点にもご注意ください。Expo が自動生成する型定義を拾うために必要です。4. Bare workflow という前提について
本文は
android/とios/を手元に置く構成(Bare)を前提にしています。現在の Expo は CNG(Continuous Native Generation)、つまりネイティブのディレクトリを設定ファイルから生成する方式が中心です。CNG を使う場合、
android/とios/は生成物なので、直接編集しても次の生成で消えます。設定はapp.jsonと config plugin 側で行います。どちらの構成で進めるかを最初に決めておくと、後で混乱しません。※ 上記は 2026 年 7 月時点の Expo 公式ドキュメントの記述に基づく整理であり、当方の環境での再検証は行っていません。
開発環境 (Expo Bare Workflow)
※ 全体参照:https://reactnative.dev/docs/environment-setup
下記のような開発環境で行います!(w/ VSCode)
try🐶everything myproject$ npx expo-env-info

  expo-env-info 1.0.5 environment info:
    System:
      OS: macOS 13.5.2
      Shell: 5.9 - /bin/zsh
    Binaries:
      Node: 20.7.0 - ~/.anyenv/envs/nodenv/versions/20.7.0/bin/node
      Yarn: 1.22.19 - ~/.anyenv/envs/nodenv/versions/20.7.0/bin/yarn
      npm: 10.1.0 - ~/.anyenv/envs/nodenv/versions/20.7.0/bin/npm
      Watchman: 2023.09.04.00 - /opt/homebrew/bin/watchman
    Managers:
      CocoaPods: 1.12.1 - /Users/xxxxx/.anyenv/envs/rbenv/shims/pod
    SDKs:
      iOS SDK:
        Platforms: DriverKit 23.0, iOS 17.0, macOS 14.0, tvOS 17.0, watchOS 10.0
      Android SDK:
        API Levels: 29, 30, 31, 32, 33
        Build Tools: 29.0.2, 30.0.2, 30.0.3, 31.0.0, 32.0.0, 33.0.0
        System Images: android-29 | Google APIs ARM 64 v8a, android-29 | Google APIs Intel x86 Atom, android-30 | Intel x86 Atom_64, android-30 | Google APIs Intel x86 Atom, android-31 | Google APIs ARM 64 v8a, android-32 | Google APIs ARM 64 v8a, android-33 | Google APIs ARM 64 v8a
    IDEs:
      Android Studio: 2022.3 AI-223.8836.35.2231.10671973
      Xcode: 15.0/15A240d - /usr/bin/xcodebuild
    npmPackages:
      expo: ~49.0.11 => 49.0.11
      react: 18.2.0 => 18.2.0
      react-native: 0.72.4 => 0.72.4
    Expo Workflow: bare

try🐶everything myproject$
それでは、Expo bare 環境を作成 > TypeScript 環境に変更 順に進めて行きます。
新しいプロジェクトを作成する
※ 全体参照:https://docs.expo.dev/routing/installation/
try🐶everything ReactNative$ npx create-expo-app --template
Need to install the following packages:
  create-expo-app@2.1.1
Ok to proceed? (y) y
? Choose a template: › - Use arrow-keys. Return to submit.
    Blank
    Blank (TypeScript)
    Navigation (TypeScript)
❯   Blank (Bare) - blank app with the native code exposed (expo prebuild)    // <- Blank (Bare) を選択する

✔ Choose a template: › Blank (Bare)
✔ What is your app named? … casablanca     // <-- 適宜入力する(casablanca)
✔ Downloaded and extracted project files.
> npm install
...
Installing CocoaPods     // <-- ☕️ 初めての設置であれば時間がかかル!
...
- cd casablanca
- npm run android
- npm run ios- npm run web
...
try🐶everything casablanca$ yarn ios  // <-- OR, yarn android
try🐶everything casablanca2$ yarn start
プロジェクトを TypeScript 環境に変更する
※ 全体参照:https://github.com/expo/examples/tree/master/with-typescript#adding-typescript-to-existing-projects
try🐶everything ReactNative$ cd casablanca
try🐶everything casablanca$ touch tsconfig.json
try🐶everything casablanca$ yarn start   // <--実行すると必要なdependenciesをチェックしてくれます
yarn run v1.22.19
$ expo start --dev-client
Starting project at /Users/jacepark/ReactNative/casablanca
Starting Metro Bundler
✔ It looks like you're trying to use TypeScript but don't have the required dependencies installed. Would you like to install typescript@^5.1.3,
@types/react@~18.2.14? … yes   // <-- yes? dependenciesへ設置、 no? devDependenciesへ手動設置可能!

› Installing 2 SDK 49.0.0 compatible native modules using npm
> npm install
...

try🐶everything casablanca$ yarn add -D typescript @types/react  // <-- devDependenciesに設置する
タイプチェックを設定する
※ 全体参照:https://docs.expo.dev/guides/typescript/
package.json の script 部分に下記のように追加するとプロジェクト全体のファイルのタイプチェックができるので設定しておけば便利です。
{
  "scripts": {
    "ts:check": "tsc"
    ...
  }
}
yarn tscコマンドを実行すると、下記のようにプロジェクトファイルのタイプチェックができます。
try🐶everything casablanca$ yarn tsc
yarn run v1.22.19
$ tsc
app/textRecognition.tsx:18:40 - error TS2552: Cannot find name 'TextRecognitionResult'. Did you mean 'SpeechRecognitionResult'?

18   const [result, setResult] = useState<TextRecognitionResult>();
                                          ~~~~~~~~~~~~~~~~~~~~~
...
Path aliases を設定する
※ 全体参照:https://docs.expo.dev/guides/typescript/#path-aliases
src ディレクトリを⬇︎のように作成します。
try🐶everything casablanca$ tree src
src
├── common
│   ├── assets
│   │   ├── fonts
│   │   │   └── SpaceMono-Regular.ttf
│   │   └── images
│   │       ├── adaptive-icon.png
│   │       ├── favicon.png
│   │       ├── icon.png
│   │       └── splash.png
│   └── constants
│       ├── colors.ts
│       └── index.ts
└── components
    ├── EditScreenInfo.tsx
    ├── StyledText.tsx
    └── Themed.tsx

6 directories, 11 files
try🐶everything casablanca$
tsconfig.jsonファイルに"paths": {"": ["src/"]}のように追加します。
// tsconfig.json

{
  "compilerOptions": {
    "strict": true,
    "baseUrl": ".",
    "paths": {"*": ["src/*"]}
  },
  "extends": "expo/tsconfig.base"
}
$ npx expo start コマンドでメトロサーバを再起動します。
以降、Line5、6 のような使い方ができます。
import React from 'react';
import {StatusBar} from 'expo-status-bar';
import {Platform, StyleSheet} from 'react-native';
import EditScreenInfo from 'components/EditScreenInfo';   // 👍 'src/components/EditScreenInfo' --> 'components/EditScreenInfo'
import {Text, View} from 'components/Themed';
...
Expo Router v2 を設定する
※ 全体参照:https://docs.expo.dev/routing/installation/#quick-start

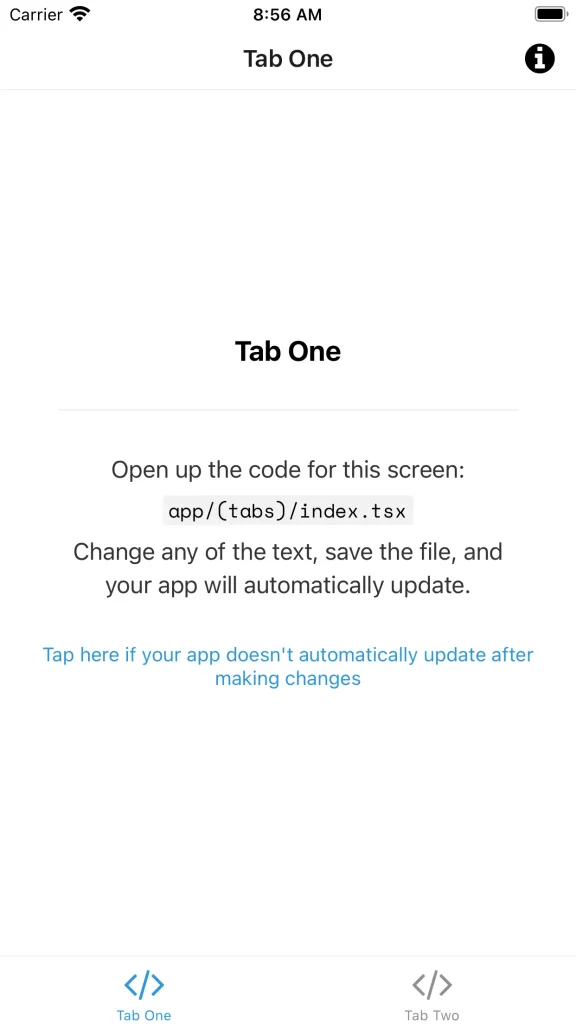
Expo Router 設置
try🐶everything casablanca$ npx expo install expo-router react-native-safe-area-context react-native-screens expo-linking expo-constants expo-status-bar react-native-gesture-handler
try🐶everything casablanca$ npx pod-install
try🐶everything casablanca$ yarn ios  // <-- OR, yarn android
Entry point を設定する
// package.json

{
  "name": "casablanca",
  "version": "1.0.0",
  "main": "expo-router/entry",  // <-- 編集
...
Enty Point を変更すると、既存の App.js index.js ファイルは不要になるので削除しても構いません。最初のクライアントファイルは app/_layout.ts に変わります。
プロジェクト設定を変更する
// app.json

{
  "expo": {
    "name": "casablanca",
    "slug": "casablanca",
    "version": "1.0.0",
    "assetBundlePatterns": ["**/*"],
    "plugins": ["expo-router"],
    "scheme": "csblanca",  // <--追加する
    "experiments": {"tsconfigPaths": true}
  }
}
...
babel.config.jsファイルを変更する
module.exports = function (api) {
  api.cache(true);
  return {
    presets: ['babel-preset-expo'],
    plugins: ['expo-router/babel'],   // <-- 追加
   ;
};
ページを作成する
※ ページとは:https://docs.expo.dev/routing/create-pages/#pages
app ディレクトリを⬇︎のように作成します。
try🐶everything casablanca$ tree app
app
├── (tabs)
│   ├── _layout.tsx
│   ├── index.tsx
│   └── two.tsx
├── [...missing].tsx
├── _layout.tsx
└── modal.tsx

1 directory, 6 files
try🐶everything casablanca$
iOS シミュレーター・Androidエミュレーターなどで動作を確認します。
あとがき
今までは、Expo & React Native アプリのルーティングとナビゲーションは React Navigation を使用していましたが、設定項目が多い・設定ファイル数が多いなど煩わしさを感じていたところでした。
一方、Expo Router は同じく Expo チームの React Navigation に基づいて構築されていてファイルベース (file-base) のルーターなのでその設定のシンプルさやナビゲーションのスピードなどに期待できるかと。
Expo Router は React Navigation の進化版であって欲しいですね。
※ ちなみに、src や app ディレクトリ下のファイルは npx create-expo-app --template > Navigation (TypeScript) コマンドを実行し作成したプロジェクトのファイルを再利用しています!(⬇︎)
try🐶everything ReactNative$ npx create-expo-app --template
? Choose a template: › - Use arrow-keys. Return to submit.
    Blank
    Blank (TypeScript)
❯   Navigation (TypeScript) - File-based routing with TypeScript enabled  // <-- 選択
    Blank (Bare)

コメント