
Stack Navigator + Paper’s Appbar
Stack Navigator でツイートのフィードを表示するスクリーン ( Feed.js ) とツイートの詳細を表示するスクリーン ( Details.js ) を作成します。
各スクリーンのヘッダーは Paper の Appbar を利用します。
まず、シンプル版に変更するので、StackNavigator.js を下記のように変更します。
src/StackNavigator.js
// StackNavigator.js
import React from "react";
import { createStackNavigator } from "@react-navigation/stack";

import { Feed } from "./Feed";
import { Details } from "./Details";

const Stack = createStackNavigator();

export const StackNavigator = () => {
  return (
    <Stack.Navigator initialRouteName="Feed">
      <Stack.Screen
        name="Feed"
        component={Feed}
        options={{ headerTitle: "Twitter" }}
      />
      <Stack.Screen
        name="Details"
        component={Details}
        options={{ headerTitle: "Tweet" }}
      />
    </Stack.Navigator>
  );
};
※ Error: undefined Unable to resolve module ./Feed from src/StackNavigator.js: のようなエラーが表示されますが、これから Feed.js と Details.js ファイルを作成しますので、そのままで良いです。
src/Feed.js と src/Details.js ファイルを作成します。( VSCode で imrnfc 実行 )
try🐶everything twitter-clone-example$ touch ./src/Feed.js
try🐶everything twitter-clone-example$ touch ./src/Details.js
src/Feed.js
// Feed.js
import React from "react";
import { View, Text, StyleSheet } from "react-native";

export const Feed = props => {
  return (
    <View style={styles.container}>
      <Text>Feed</Text>
    </View>
  );
};

const styles = StyleSheet.create({
  container: {
    flex: 1,
    alignItems: "center",
    justifyContent: "center"
  }
});
src/Details.js
//Detais.js
import React from "react";
import { View, Text, StyleSheet } from "react-native";

export const Details = props => {
  return (
    <View style={styles.container}>
      <Text>Details</Text>
    </View>
  );
};

const styles = StyleSheet.create({
  container: {
    flex: 1,
    alignItems: "center",
    justifyContent: "center"
  }
});
下記のようになります。
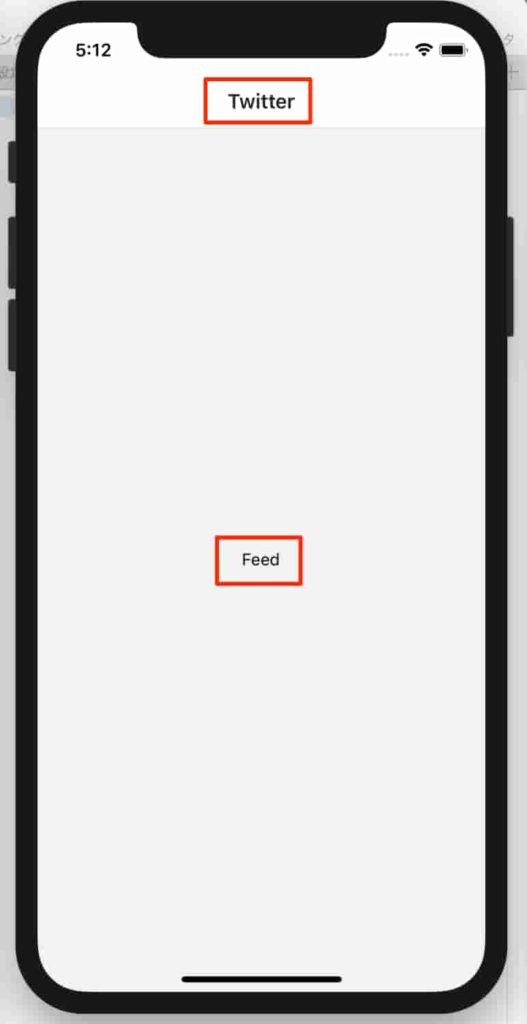
次は、Stack Navigator の ヘッダー を作成します。
- Paper の
Appbar.Headerコンポーネントを Stack のscreenOptionsのヘッダーとして渡して作成します。 - また、
screenの値を持つheaderModeプロパティを渡し、見栄えの良いフェードイン/アウトアニメーションを作成します。 - Paper のテーマも適用し始めます。
既存のファイルを下記のように変更してください。
src/StackNavigator.js
screenOptions の header プロパティに渡す関数は、3つのプロパティ ( scene、previous、navigation ) にアクセスできます。
- screen : Stack の一番上の画面のタイトルにアクセスし、ヘッダーに表示できます
- previous : Stack の他の画面があるかどうかを示します。
- navigation : さまざまな画面に移動できます。( e.g. Drawer の開閉など )
// StackNavigator.js
import React from "react";
import { TouchableOpacity } from "react-native";
import { createStackNavigator } from "@react-navigation/stack";
import { Appbar, Avatar, useTheme } from "react-native-paper";
import { MaterialCommunityIcons } from "@expo/vector-icons";

import { Feed } from "./Feed";
import { Details } from "./Details";

const Stack = createStackNavigator();

const Header = ({ scene, previous, navigation }) => {
  const { options } = scene.descriptor;
  const theme = useTheme();
  const title =
    options.headerTitle !== undefined
      ? options.headerTitle
      : options.title !== undefined
      ? options.title
      : scene.route.name;

  return (
    <Appbar.Header theme={{ colors: { primary: theme.colors.surface } }}>
      {previous ? (
        <Appbar.BackAction
          onPress={navigation.pop}
          color={theme.colors.primary}
        />
      ) : (
        <TouchableOpacity
          onPress={() => {
            navigation.openDrawer();
          }}
        >
          <Avatar.Image
            size={40}
            source={{
              uri:
                "https://pbs.twimg.com/profile_images/952545910990495744/b59hSXUd_400x400.jpg"
            }}
          />
        </TouchableOpacity>
      )}
      <Appbar.Content
        title={
          previous ? title : <MaterialCommunityIcons name="twitter" size={40} />
        }
      />
    </Appbar.Header>
  );
};

export const StackNavigator = () => {
  return (
    <Stack.Navigator
      initialRouteName="Feed"
      headerMode="screen"
      screenOptions={{
        header: ({ scene, previous, navigation }) => (
          <Header scene={scene} previous={previous} navigation={navigation} />
        )
      }}
    >
      <Stack.Screen
        name="Feed"
        component={Feed}
        options={{ headerTitle: "Twitter" }}
      />
      <Stack.Screen
        name="Details"
        component={Details}
        options={{ headerTitle: "Tweet" }}
      />
    </Stack.Navigator>
  );
};
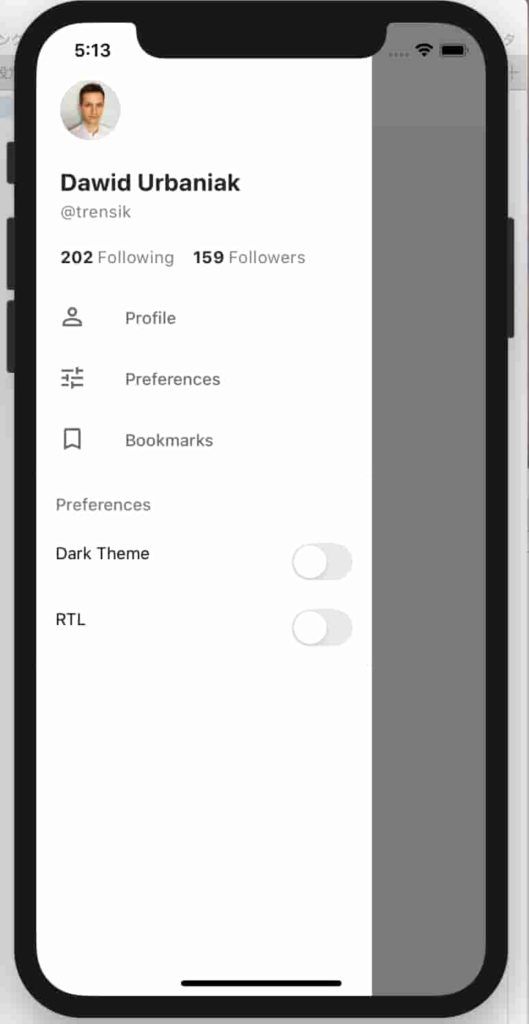
すると、下記のように変わります。
Tab と Drawer ナビケーターはデフォルトでスクリーン間の移動ができますが、Stack では別途実装する必要があるため、まだ、Feed から Details スクリーンまでは移動できない状態です。
▲ ヘッダーの「戻る」ボタンを押すたびに navigation.pop 関数を呼び出します。Details から Feed スクリーンに戻ることもできます。
次は、Details.js ファイルから設定して行きます。
必要なファイルを作成します。
try🐶everything twitter-clone-example$ touch ./src/Details.js
try🐶everything twitter-clone-example$ mkdir ./src/components
try🐶everything twitter-clone-example$ touch ./src/components/DetailedTweet.js
Details.js ファイルを下記のように変更します。
( ※シミュレータにエラーメッセージが出ますがこの設定がおわるまでそのままにしておきます。)
- 詳細内容を
DetailedTweet.jsに分離します。
src/Details.js
//Detais.js
import React from "react";
import { DetailedTweet } from "./components/DetailedTweet";

export const Details = props => {
  return <DetailedTweet {...props.route.params} />;
};
src/components/DetailedTweet.js ファイルを作成します。
src/components/DetailedTweet.js
// DetailedTweet.js
import React from "react";
import { StyleSheet, View, Image } from "react-native";
import {
  Surface,
  Title,
  Caption,
  Avatar,
  Subheading,
  useTheme
} from "react-native-paper";
import color from "color";

export const DetailedTweet = props => {
  const theme = useTheme();
  const contentColor = color(theme.colors.text)
    .alpha(0.8)
    .rgb()
    .string();
  const imageBorderColor = color(theme.colors.text)
    .alpha(0.15)
    .rgb()
    .string();

  return (
    <Surface style={styles.container}>
      <View style={styles.topRow}>
        <Avatar.Image
          style={styles.avatar}
          source={{ uri: props.avatar }}
          size={60}
        />
        <View>
          <Title>{props.name}</Title>
          <Caption style={styles.handle}>{props.handle}</Caption>
        </View>
      </View>
      <Subheading style={(styles.content, { color: contentColor })}>
        {props.content}
      </Subheading>
      <Image
        source={{ uri: props.image }}
        style={[
          styles.image,
          {
            borderColor: imageBorderColor
          }
        ]}
      />
    </Surface>
  );
};

const styles = StyleSheet.create({
  container: {
    flex: 1,
    padding: 20
  },
  avatar: {
    marginRight: 20
  },
  topRow: {
    flexDirection: "row",
    alignItems: "center"
  },
  handle: {
    marginRight: 3,
    lineHeight: 12
  },
  content: {
    marginTop: 25,
    fontSize: 20,
    lineHeight: 30
  },
  image: {
    borderWidth: StyleSheet.hairlineWidth,
    marginTop: 25,
    borderRadius: 20,
    width: "100%",
    height: 280
  }
});
Feed.js ファイルを変更します
Paper 側で既に用意されてある仮の Tweet データを FlatList を使用してレンタリングするように作成します。
必要なファイルを作成します。
try🐶everything twitter-clone-example$ touch ./src/components/Tweet.js
try🐶everything twitter-clone-example$ mkdir ./src/data
try🐶everything twitter-clone-example$ touch ./src/data/index.js
src/Feed.js
// Feed.js
import React from "react";
import { FlatList, View, StyleSheet } from "react-native";
import { useTheme } from "react-native-paper";
import { Tweet } from "./components/Tweet";
import { tweets } from "./data";

function renderItem({ item }) {
  return <Tweet {...item} />;
}

function keyExtractor(item) {
  return item.id.toString();
}

export const Feed = props => {
  const theme = useTheme();
  const data = tweets.map(tweetsProps => ({
    ...tweetsProps,
    onPress: () =>
      props.navigation && props.navigation.push("Details", { ...tweetsProps })
  }));

  return (
    <FlatList
      contentContainerStyle={{ backgroundColor: theme.colors.primary }}
      style={{ backgroundColor: theme.colors.background }}
      data={data}
      renderItem={renderItem}
      keyExtractor={keyExtractor}
      ItemSeparatorComponent={() => (
        <View style={{ height: StyleSheet.hairlineWidth }} />
      )}
    />
  );
};
src/components/Tweet.js と src/data/index.js ファイルを作成します。
src/components/Tweet.js
// Tweet.js
import React from "react";
import { StyleSheet, View, Image, TouchableOpacity } from "react-native";
import {
  Surface,
  Title,
  Caption,
  Text,
  Avatar,
  TouchableRipple,
  useTheme
} from "react-native-paper";
import { MaterialCommunityIcons } from "@expo/vector-icons";
import color from "color";

export const Tweet = props => {
  const theme = useTheme();
  const iconColor = color(theme.colors.text)
    .alpha(0.54)
    .rgb()
    .string();
  const contentColor = color(theme.colors.text)
    .alpha(0.58)
    .rgb()
    .string();
  const imageBorderColor = color(theme.colors.text)
    .alpha(0.15)
    .rgb()
    .string();

  return (
    <TouchableRipple onPress={() => props.onPress(props.id)}>
      <Surface style={styles.container}>
        <View style={styles.leftColum}>
          <Avatar.Image source={{ uri: props.avatar }} size={60} />
        </View>
        <View style={styles.rightColum}>
          <View style={styles.topRow}>
            <Title>{props.name}</Title>
            <Caption style={styles.handle}>{props.handle}</Caption>
            <Caption style={(styles.handle, styles.dot)}>{"\u2824"}</Caption>
            <Caption>{props.date}</Caption>
          </View>
          <Text style={{ color: contentColor }}>{props.content}</Text>
          <Image
            source={{ uri: props.image }}
            style={[styles.image, { borderColor: imageBorderColor }]}
          />
          <View style={styles.bottomRow}>
            <TouchableOpacity
              onPress={() => {}}
              hitSlop={{ top: 10, bottom: 10 }}
            >
              <View style={styles.iconContainer}>
                <MaterialCommunityIcons
                  name="comment-outline"
                  size={12}
                  color={iconColor}
                />
                <Caption style={styles.iconDescription}>
                  {props.comments}
                </Caption>
              </View>
            </TouchableOpacity>
            <TouchableOpacity
              onPress={() => {}}
              hitSlop={{ top: 10, bottom: 10 }}
            >
              <View style={styles.iconContainer}>
                <MaterialCommunityIcons
                  name="share-outline"
                  size={14}
                  color={iconColor}
                />
                <Caption style={styles.iconDescription}>
                  {props.retweets}
                </Caption>
              </View>
            </TouchableOpacity>
            <TouchableOpacity
              onPress={() => {}}
              hitSlop={{ top: 10, bottom: 10 }}
            >
              <View style={styles.iconContainer}>
                <MaterialCommunityIcons
                  name="heart-outline"
                  size={12}
                  color={iconColor}
                />
                <Caption style={styles.iconDescription}>{props.hearts}</Caption>
              </View>
            </TouchableOpacity>
          </View>
        </View>
      </Surface>
    </TouchableRipple>
  );
};

const styles = StyleSheet.create({
  container: {
    flex: 1,
    flexDirection: "row",
    paddingTop: 10,
    paddingHorizontal: 10
  },
  leftColumn: {
    width: 100,
    alignItems: "center"
  },
  rightColum: {
    flex: 1,
    marginHorizontal: 10
  },
  topRow: {
    flexDirection: "row",
    alignItems: "baseline"
  },
  handle: {
    marginRight: 3
  },
  dot: {
    fontSize: 3
  },
  image: {
    borderWidth: StyleSheet.hairlineWidth,
    marginTop: 10,
    borderRadius: 20,
    width: "100%",
    height: 150
  },
  bottomRow: {
    paddingVertical: 10,
    flexDirection: "row",
    alignItems: "center",
    justifyContent: "space-between"
  },
  iconContainer: {
    flexDirection: "row",
    alignItems: "center"
  },
  iconDescription: {
    marginLeft: 2,
    lineHeight: 12
  }
});
src/data/index.js
// data/index.js
export const tweets = [
  {
    id: 1,
    name: "🌈 Josh",
    handle: "@JoshWComeau",
    date: "10h",
    content:
      '🔥 Automatically use "smart" directional curly quotes with the `quotes` CSS property! Even handles nested quotes with the <q> tag :o',
    image: "https://pbs.twimg.com/media/EOUrCOcWAAA71rA?format=png&name=small",
    avatar:
      "https://pbs.twimg.com/profile_images/461190672117035010/0kJ4pynr_400x400.jpeg",
    comments: 12,
    retweets: 36,
    hearts: 175
  },
  {
    id: 2,
    name: "Satyajit Sahoo",
    handle: "@satya164",
    date: "20h",
    content:
      "Not sure if I should be proud or ashamed of this piece of art 😅\n\n#Typescript",
    image: "https://pbs.twimg.com/media/EONH4KWX4AEV-JP?format=jpg&name=medium",
    avatar:
      "https://pbs.twimg.com/profile_images/1203032057875771393/x0nVAZPL_400x400.jpg",
    comments: 64,
    retweets: 87,
    hearts: 400
  },
  {
    id: 3,
    name: "Elvin",
    handle: "@elvin_not_11",
    date: "14h",
    content:
      "Hid the home indicator from the app so the device resembles an actual iPod even more. Thanks @flipeesposito for the suggestion!",
    image:
      "https://static.antyweb.pl/uploads/2014/09/IPod_classic_6G_80GB_packaging-2007-09-22-1420x670.jpg",
    avatar:
      "https://pbs.twimg.com/profile_images/1203624639538302976/h-rvrjWy_400x400.jpg",
    comments: 23,
    retweets: 21,
    hearts: 300
  },
  {
    id: 4,
    name: "🌈 Josh",
    handle: "@JoshWComeau",
    date: "10h",
    content:
      '🔥 Automatically use "smart" directional curly quotes with the `quotes` CSS property! Even handles nested quotes with the <q> tag :o',
    image: "https://pbs.twimg.com/media/EOUrCOcWAAA71rA?format=png&name=small",
    avatar:
      "https://pbs.twimg.com/profile_images/461190672117035010/0kJ4pynr_400x400.jpeg",
    comments: 12,
    retweets: 36,
    hearts: 175
  },
  {
    id: 5,
    name: "Satyajit Sahoo",
    handle: "@satya164",
    date: "20h",
    content:
      "Not sure if I should be proud or ashamed of this piece of art 😅\n\n#Typescript",
    image: "https://pbs.twimg.com/media/EONH4KWX4AEV-JP?format=jpg&name=medium",
    avatar:
      "https://pbs.twimg.com/profile_images/1203032057875771393/x0nVAZPL_400x400.jpg",
    comments: 64,
    retweets: 87,
    hearts: 400
  },
  {
    id: 6,
    name: "Elvin",
    handle: "@elvin_not_11",
    date: "14h",
    content:
      "Hid the home indicator from the app so the device resembles an actual iPod even more. Thanks @flipeesposito for the suggestion!",
    image:
      "https://static.antyweb.pl/uploads/2014/09/IPod_classic_6G_80GB_packaging-2007-09-22-1420x670.jpg",
    avatar:
      "https://pbs.twimg.com/profile_images/1203624639538302976/h-rvrjWy_400x400.jpg",
    comments: 23,
    retweets: 21,
    hearts: 300
  }
];
※ TypeError: undefined is not an object (evaluating 'state.routes[state.index].key') のようなエラーが表示されます。
対処:src/StackNavigator.jsファイルを下記のように修正します。▼
return (
<Appbar.Header theme={{ colors: { primary: theme.colors.surface } }}>
{previous ? (
<Appbar.BackAction
– onPress={navigation.pop}
+ onPress={navigation.goBack}
color={theme.colors.primary}
/>
) : (
…
iOS シミュレータを再起動 ( ⌘ R ) し、下記のように動作すれば OK です。
▲これで、Feed と Details 間の移動ができました。次は、Tab Navigator を実装する番です。


コメント
参考になりました。ありがとうございます。
React NativeはネイティブアプリらしいUIが作りづらく苦労していたので参考になりました。
技術革新も早くコピペしてもまともに動かないサイトも多く非常に参考になりました。
動かない部分もありますが自分で調べてみようと思います。